


-
Life Advice & Visual Arts Welcome Guest
Posting Rules Bluelight Rules 🌌 Share Your Dreams! 🌌 📸 15 Years of Photo Contests 📸 -
LAVA Moderator: streaM Freak
You are using an out of date browser. It may not display this or other websites correctly.
You should upgrade or use an alternative browser.
You should upgrade or use an alternative browser.
Bluelight Motorcycle Club
- Thread starter purplefirefly
- Start date


PepperSocks
Bluelight Crew
^ Where you at man? Those are some nice mountains with leaves still green & on the trees. I'm sort of jealous ")
rangrz
Bluelighter
^ studded tires bro.
I know a guy with a 250 motocross that he has studded tires for use in the winter. He rides the ice where I live.
I ride the ice on my 4-wheeler; I've not been brave enough to do so without that 2nd dimension of stability.
My 4-wheeler is an uncorked 350 warrior so it's got some go. It's great on the ice, to be going full bore and then crank it into a hard fishtail doughnut spin, fun man. Also there a creek that I ride on that meanders (curves), so when you go around it in top gear full throttle you can drift around the long turns sideways around 100k. Ice is fun as hell
It just takes a while to get going without studded tires, once you have momentum it's all good. With studded tires you wouldn't be able to fishtail/doughnut/drift though.
I don't think I'd want to loose the back end of a 25+ year old 2 stroke on a sheet of frozen ice anyways... I enjoy not breaking my spine. I am def looking forward to it tho!
Here, the ice racing is a pretty amateur/easy going thing that is done with a course set up with pylons on the lake... Its a bit safer then a river, cause if you go down, you just slide along the ice instead of become intimate with a tree.
Jackal
Bluelighter
Finally. . . .
Ice racing sounds like fun.
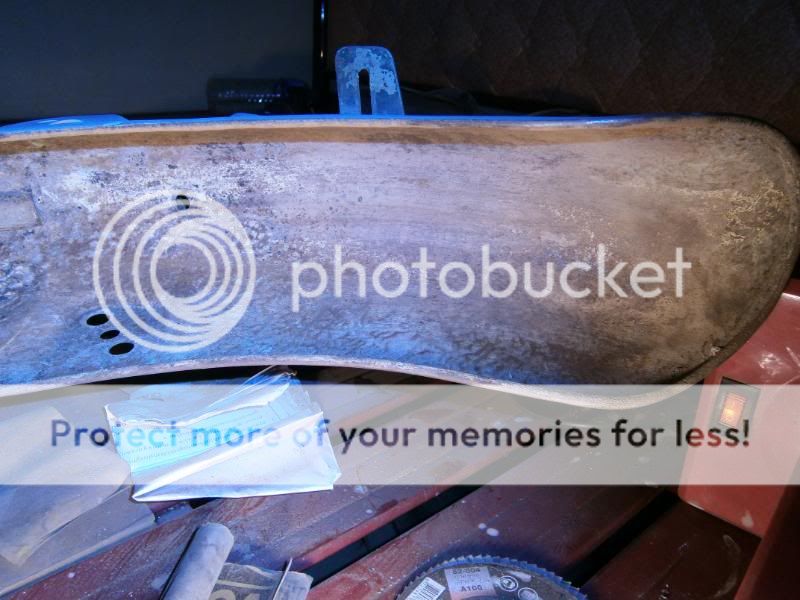
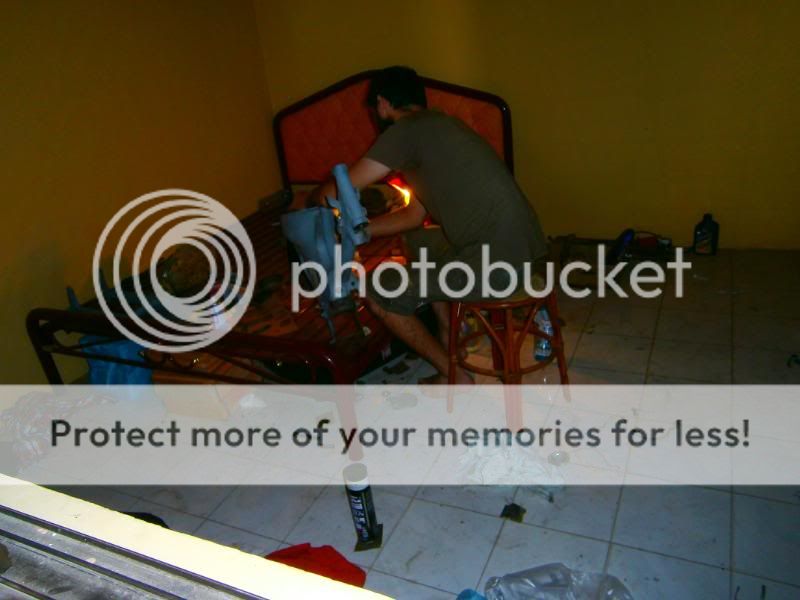
I finally got back to my little project Cub.
So, I went out and bought a sled load of 320 wet/dry paper and after some sore fingers brought things to this:
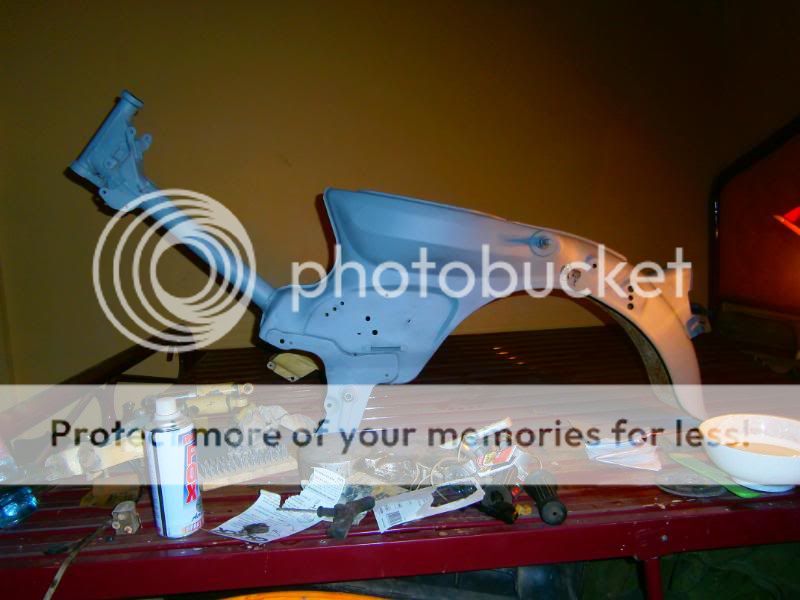
Yup, that's my bed the frame's resting upon. My wife is very forgiving
The blemish in front of the rear indicator mount is where I had just JB welded a 2mm hole but not sanded back the JB yet.
Sanded:
Sanding back a spot weld:
Head bearings were worse for wear, to say the least:

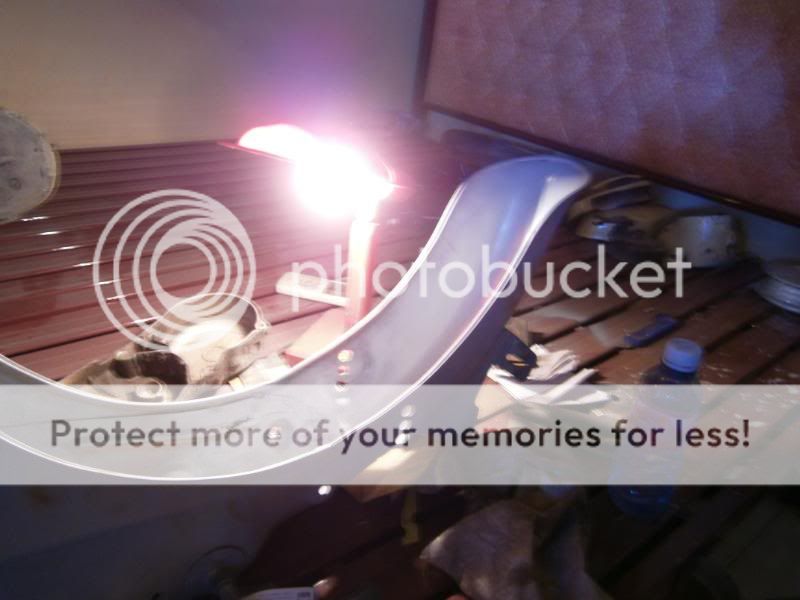
I then looked under her skirt:
That's going to require copious application of elbow grease.
__________________
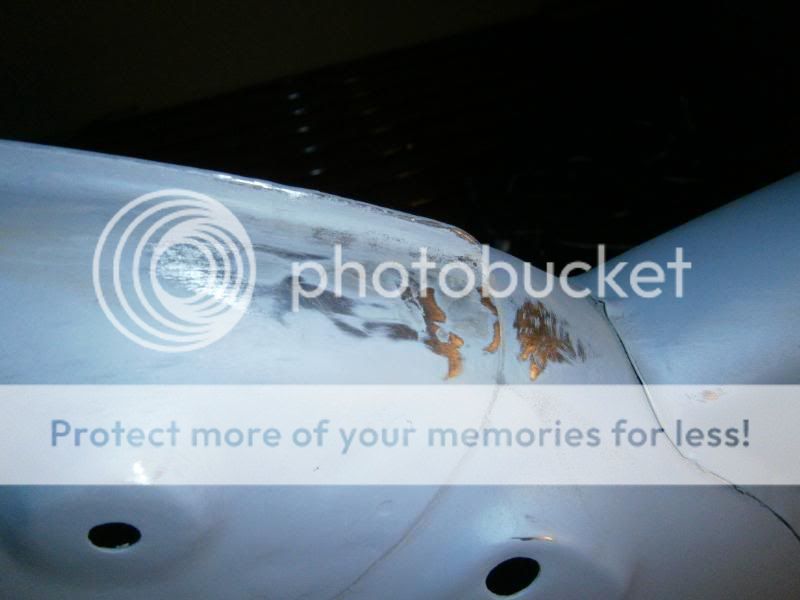
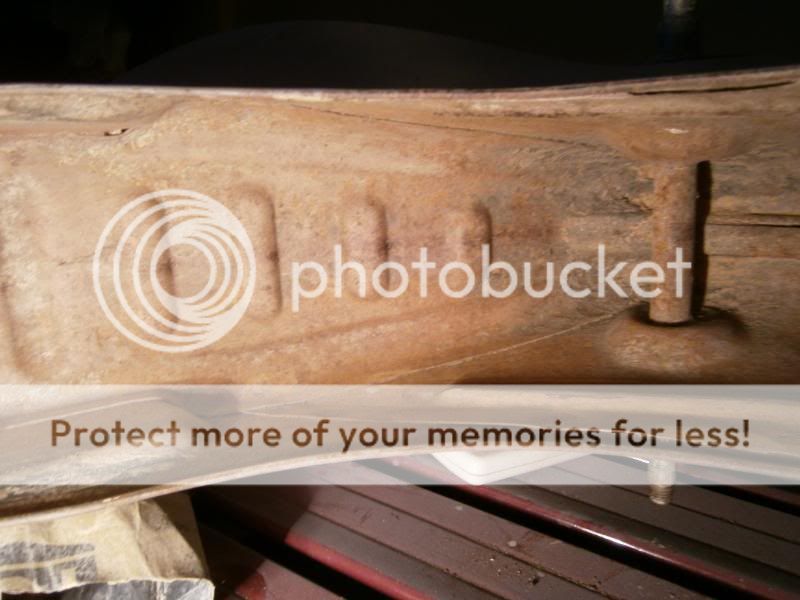
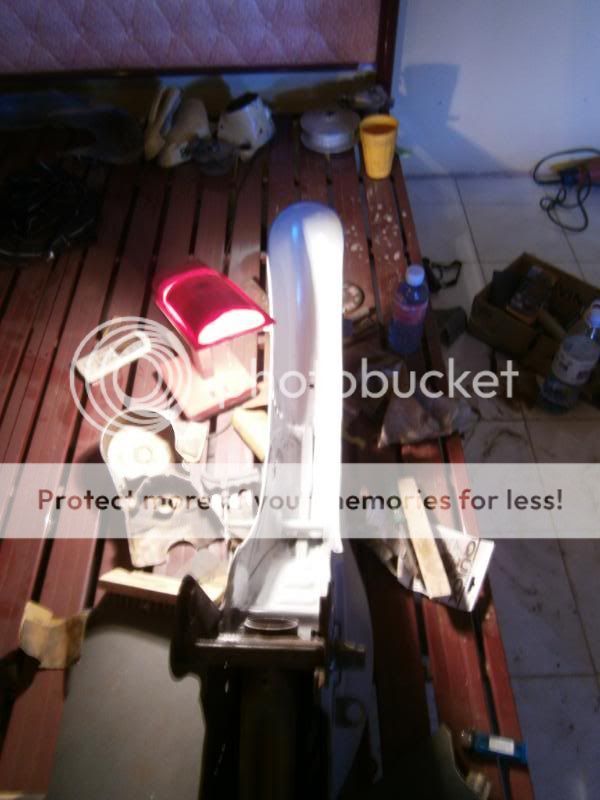
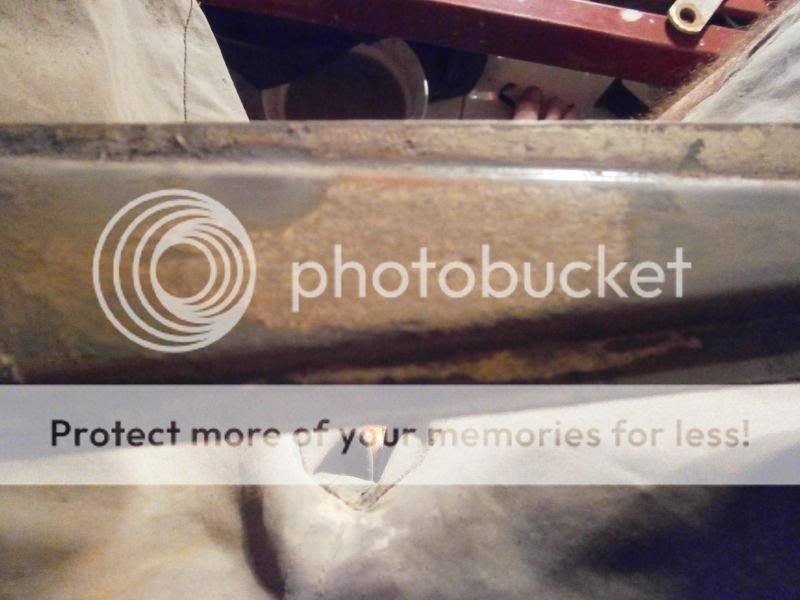
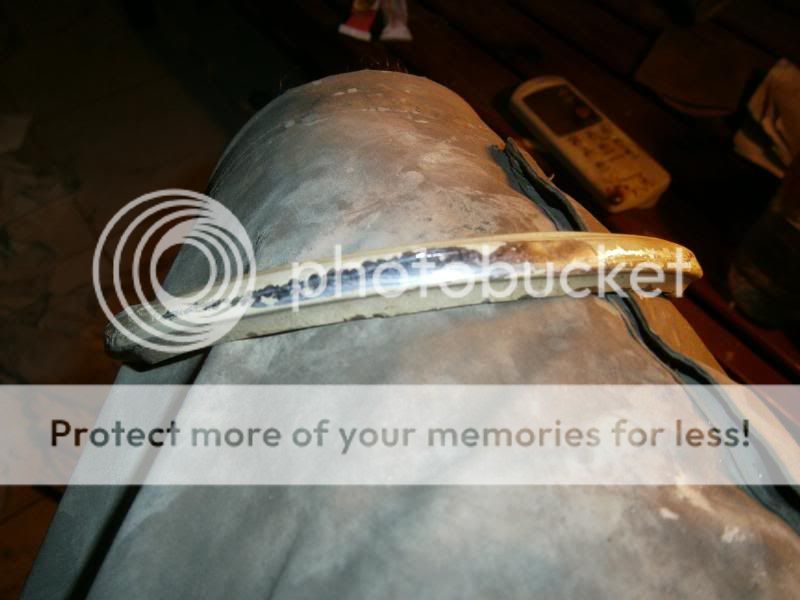
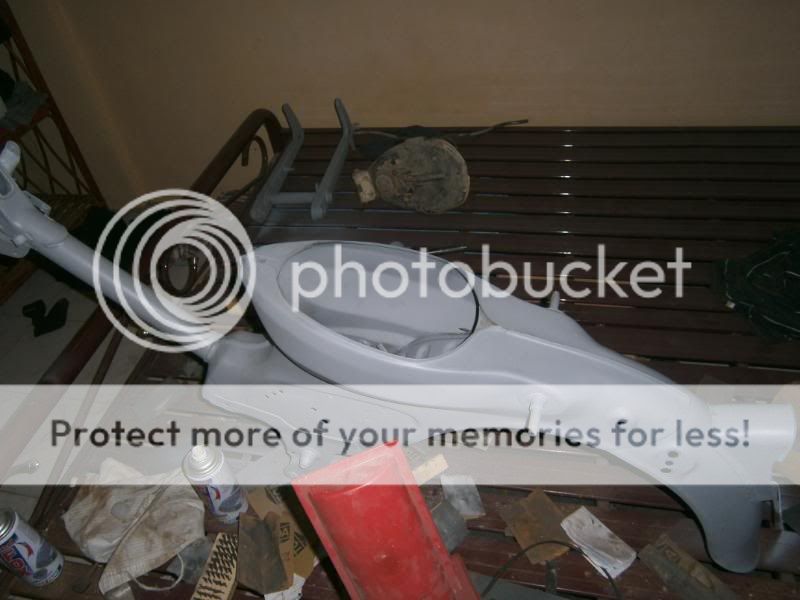
The rear fender has been repaired in the past. Welds look decent enough.
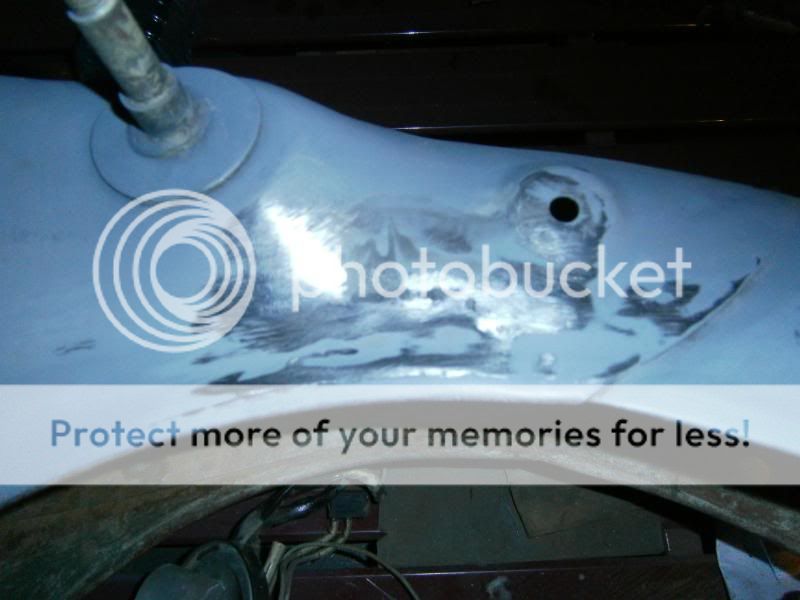
When I had at cleaning up the tail it turned out to be better than at first glance. I didn't wash the bike before the teardown, so there was a good bit of mud that came right off when I wirebrushed it and that, plus half an hour of sanding made it pretty clean.
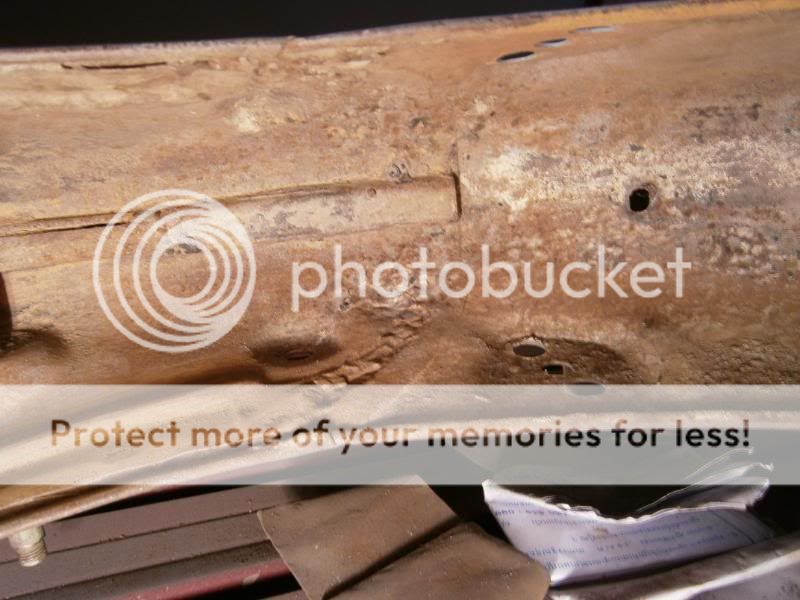
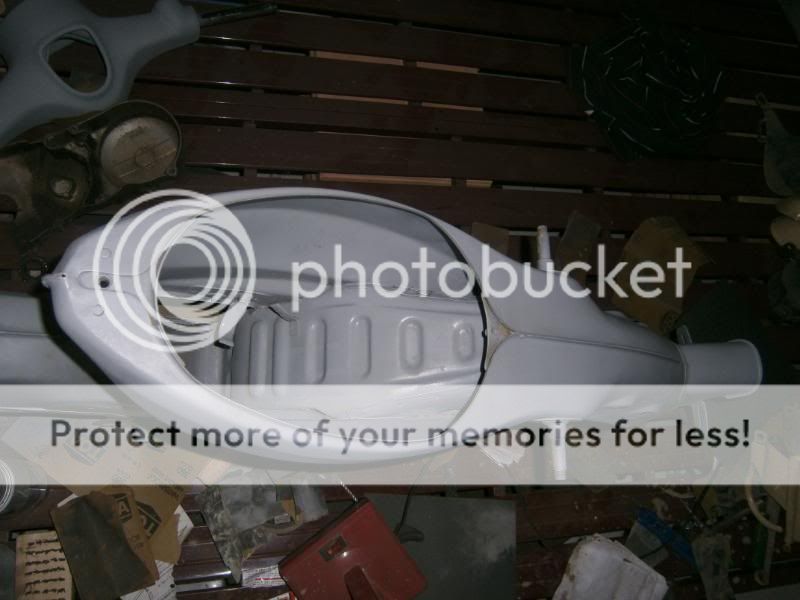
In the next pic you can see the spot inside the body where water got in and caused the pinhole I JB welded earlier. I opened it up, cleaned it out, packed it with grease and sealed it up. Not the best way, but should hold it for now.
Tomorrow I will look after the front section of the underbelly and inside the frame where the tank will sit. Then underseal the rear fender to prevent future corrosion.
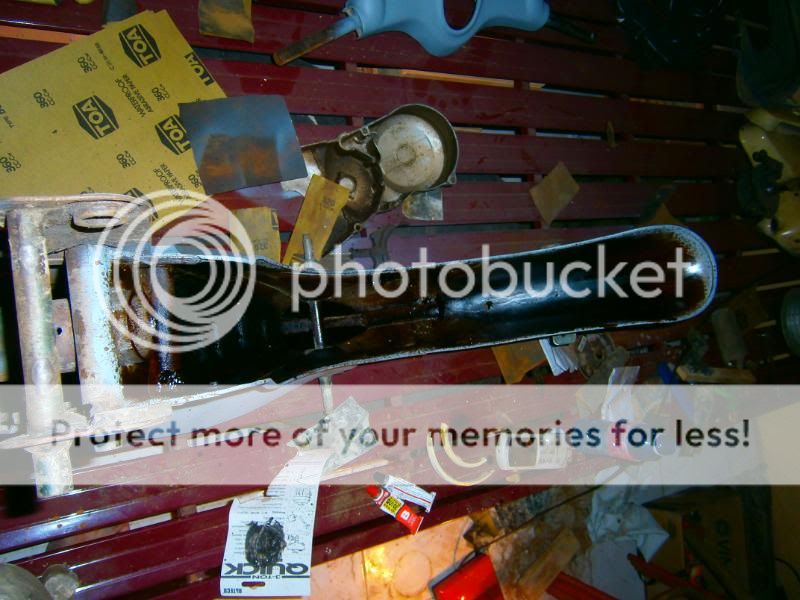
Forks are not beautiful:cry
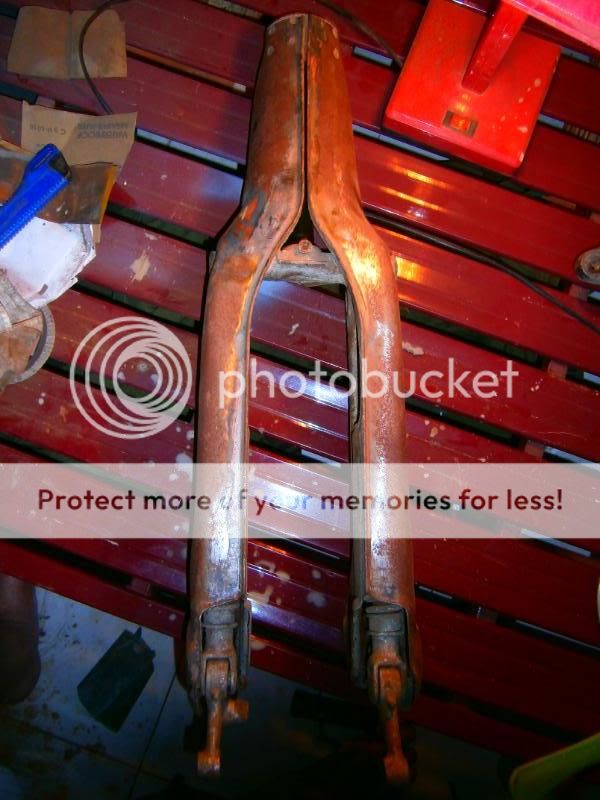
The cantilever assembly has to come out because, after all this time, the springs are totally knackered.
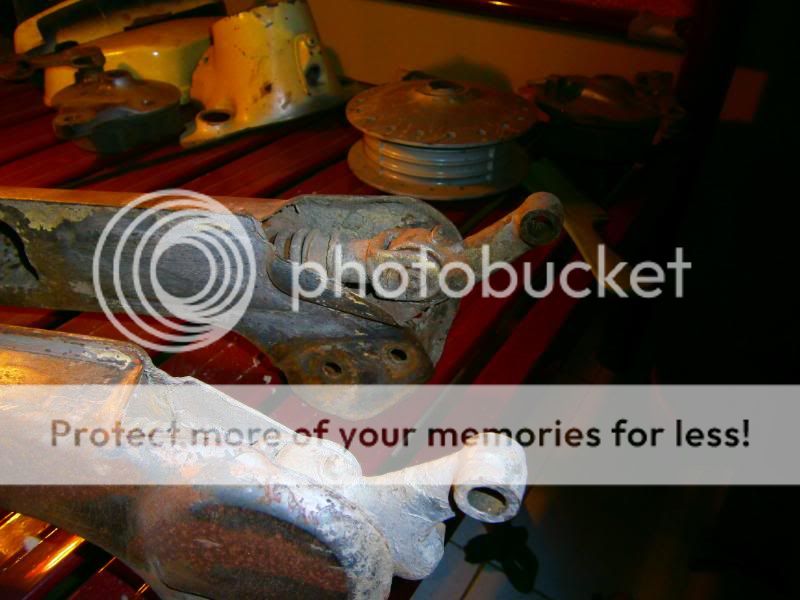
The left of the picture above shows where the nut and stud that secure the spring/cantilever assembly are. Both the stud and nut are massively corroded and it's too tight for a saw, plus a hammer and chisel would be too brutal - so I'm just gonna have to try and shear them off with torque.:kboom
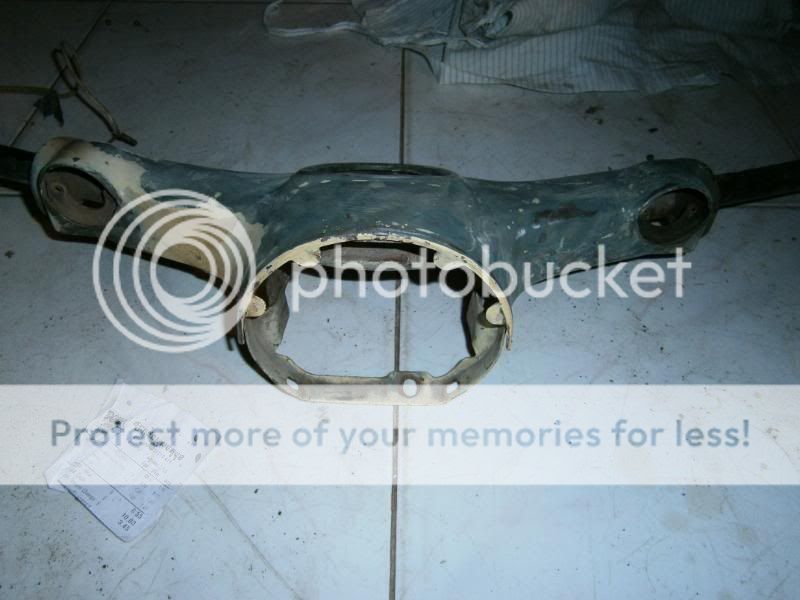
Slow going sanding all the layers off the metal dash assembly. Why I didn't do this when I was doing all the other metal paint stripping, I don't know. The most recent layer of paint is horrendous. It's almost like household emulsion and takes forever to sand off.
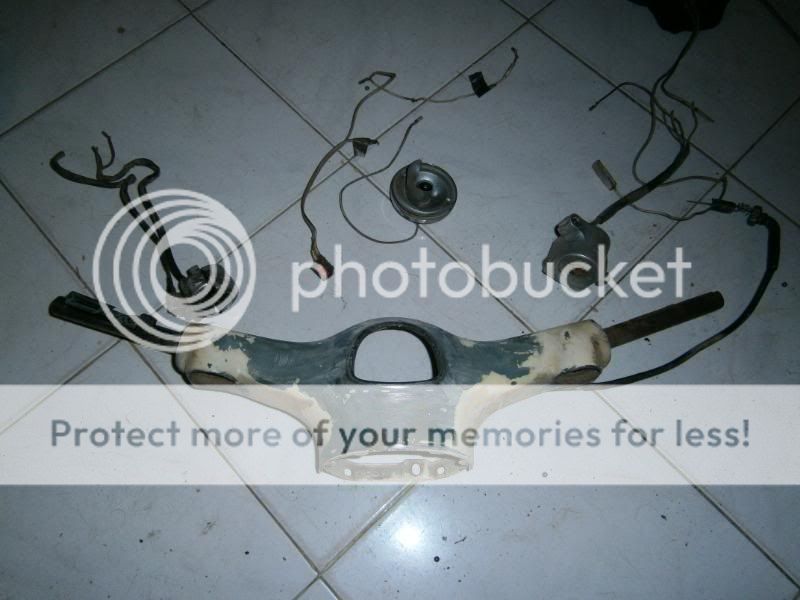
The old contrils for the turn signals and lights had their toggle switches broken off ages ago, so the loom was cut and small, red, flick switches were used instead. One for lights, one for ignition and a horn button left working.
I'm going to buy a new loom from a Chinese company in one of the markets here. Hopefully under $20.
Methinks it's gonna be fun when I open the engine:evil
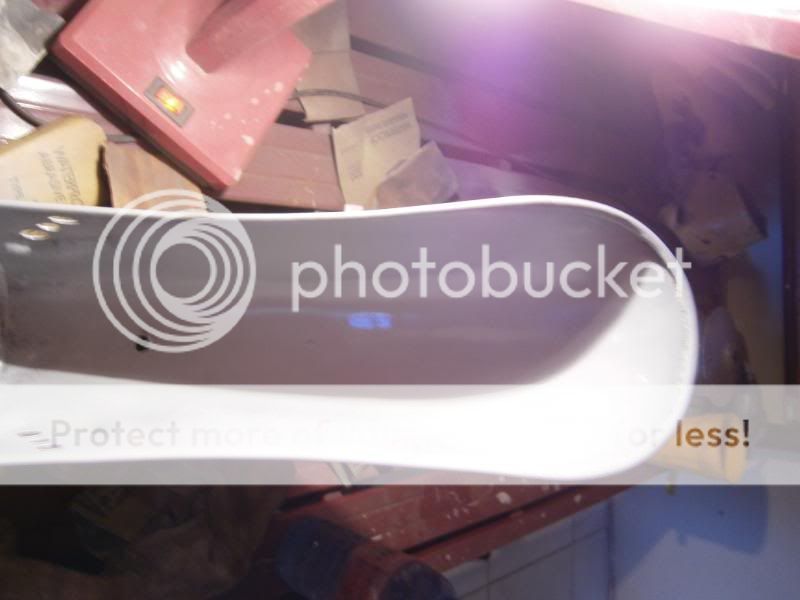
I had a couple of hours before opening the bar so I finished sanding the swingarm and primed it up.
Before:
After:
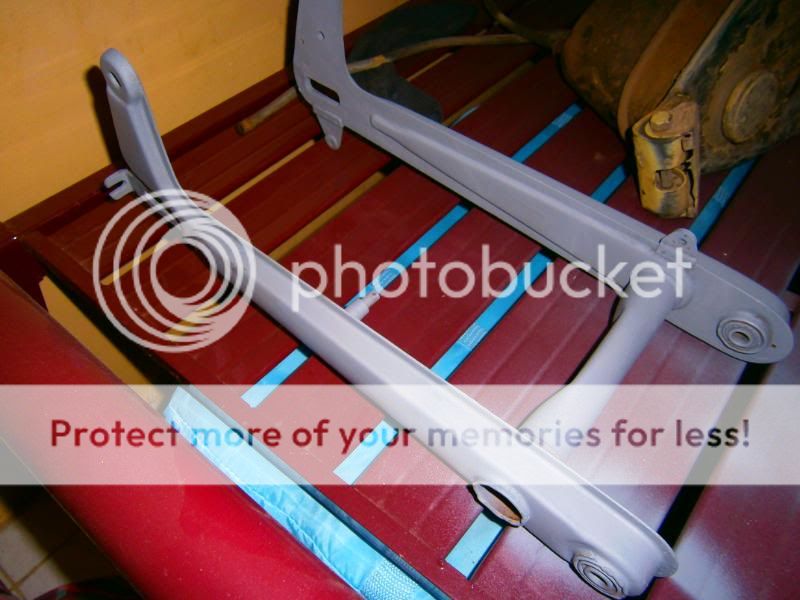
Then I undersealed beneath the rear fender of the frame. Some people paint first and then underseal. I do the opposite, if it's good enough for VW to do it that way, so will I.
Then I had a look at the front trim which holds the "50" badge.
The gimp who owned this before me who painted the thing that scummy yellow colour also sprayed over the lovely silver badge:eek1
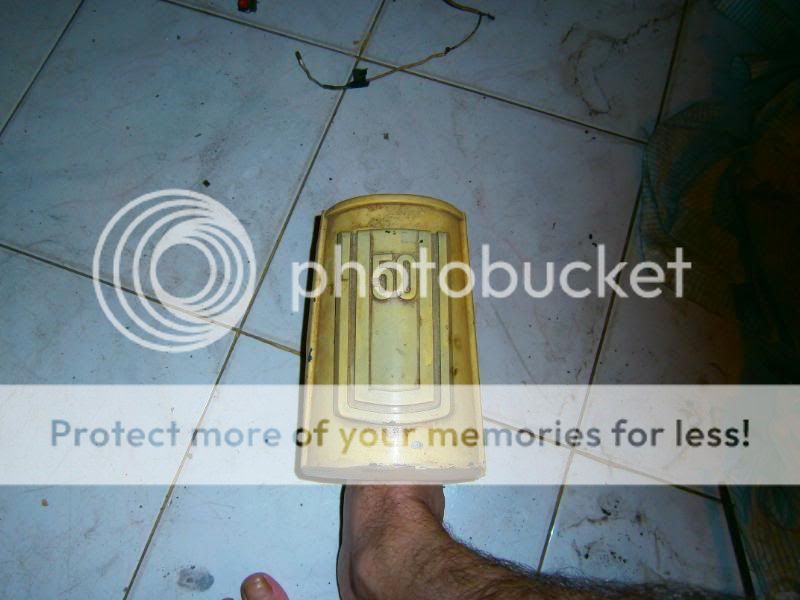
Luckily, the paint didn't take well to this and I was able to chip it off gently with a metal scribe without damaging the badge. It still needs further cleaning. but it's an improvement.
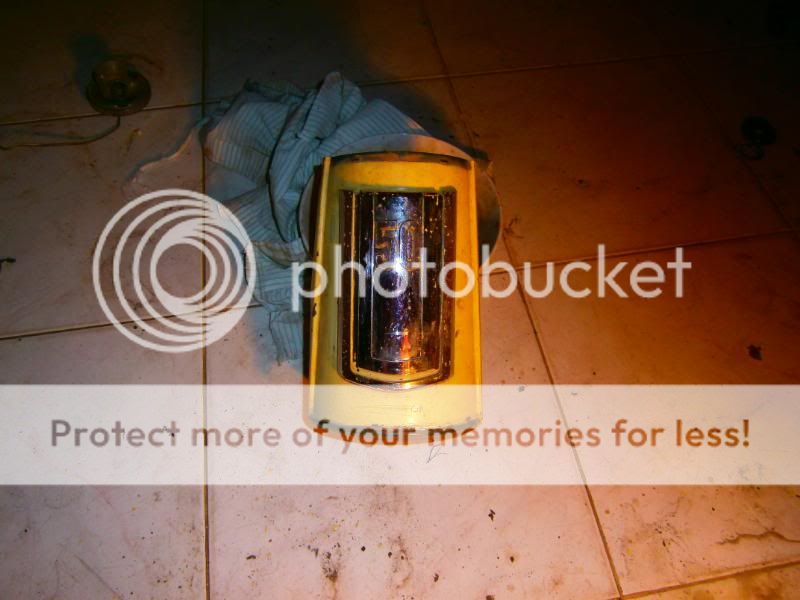
He also painted the chrome trim for around this part. This will be slower to clean up:
I did get the rest of the underside of the frame around the engine/center-stand mount cleaned up and primed & the inside of the frame in the tank/electrics space.
The Mrs snapped me sanding furiously:
Frame largely sorted:
Not 100% happy with the spot just to the left of the rear blinker mount. It looks like a little skim is in order.
I think he forks are too corroded to be worth repairing. I'll just get a secondhand set and work with those.
Ice racing sounds like fun.
I finally got back to my little project Cub.
So, I went out and bought a sled load of 320 wet/dry paper and after some sore fingers brought things to this:
Yup, that's my bed the frame's resting upon. My wife is very forgiving
The blemish in front of the rear indicator mount is where I had just JB welded a 2mm hole but not sanded back the JB yet.
Sanded:
Sanding back a spot weld:
Head bearings were worse for wear, to say the least:
I then looked under her skirt:
That's going to require copious application of elbow grease.
__________________
The rear fender has been repaired in the past. Welds look decent enough.
When I had at cleaning up the tail it turned out to be better than at first glance. I didn't wash the bike before the teardown, so there was a good bit of mud that came right off when I wirebrushed it and that, plus half an hour of sanding made it pretty clean.
In the next pic you can see the spot inside the body where water got in and caused the pinhole I JB welded earlier. I opened it up, cleaned it out, packed it with grease and sealed it up. Not the best way, but should hold it for now.
Tomorrow I will look after the front section of the underbelly and inside the frame where the tank will sit. Then underseal the rear fender to prevent future corrosion.
Forks are not beautiful:cry
The cantilever assembly has to come out because, after all this time, the springs are totally knackered.
The left of the picture above shows where the nut and stud that secure the spring/cantilever assembly are. Both the stud and nut are massively corroded and it's too tight for a saw, plus a hammer and chisel would be too brutal - so I'm just gonna have to try and shear them off with torque.:kboom
Slow going sanding all the layers off the metal dash assembly. Why I didn't do this when I was doing all the other metal paint stripping, I don't know. The most recent layer of paint is horrendous. It's almost like household emulsion and takes forever to sand off.
The old contrils for the turn signals and lights had their toggle switches broken off ages ago, so the loom was cut and small, red, flick switches were used instead. One for lights, one for ignition and a horn button left working.
I'm going to buy a new loom from a Chinese company in one of the markets here. Hopefully under $20.
Methinks it's gonna be fun when I open the engine:evil
I had a couple of hours before opening the bar so I finished sanding the swingarm and primed it up.
Before:
After:
Then I undersealed beneath the rear fender of the frame. Some people paint first and then underseal. I do the opposite, if it's good enough for VW to do it that way, so will I.
Then I had a look at the front trim which holds the "50" badge.
The gimp who owned this before me who painted the thing that scummy yellow colour also sprayed over the lovely silver badge:eek1
Luckily, the paint didn't take well to this and I was able to chip it off gently with a metal scribe without damaging the badge. It still needs further cleaning. but it's an improvement.
He also painted the chrome trim for around this part. This will be slower to clean up:
I did get the rest of the underside of the frame around the engine/center-stand mount cleaned up and primed & the inside of the frame in the tank/electrics space.
The Mrs snapped me sanding furiously:
Frame largely sorted:
Not 100% happy with the spot just to the left of the rear blinker mount. It looks like a little skim is in order.
I think he forks are too corroded to be worth repairing. I'll just get a secondhand set and work with those.
Mazey
Bluelighter
Our Toys for tots bike run , every Christmas time .
http://www.youtube.com/watch?v=vEiU89ceBwM
http://www.youtube.com/watch?v=vEiU89ceBwM
PepperSocks
Bluelight Crew
Now you sir, take pride in your work and are not averse to one hell of a job. That's a bottom-up total rebuild if I ever saw one.
Those front forks look corroded beyond being able take them apart and clean them up, oiling etc. Do you think you can find replacements?
JB weld is to me what duct tape is to Red Green
That stuff is so strong and handy, it works on everything, including junctions between plastic and metal. The aftermarket carb for my 4-wheeler was supposed to be a direct bolt on, but it just had a round end (for a clamp), whereas the intake on the engine actually has a flange mount. So I took the intake off the engine, and hollowed out the hole with a dremel to fit the round end of the carb in. JB welded the surfaces, put the carb in the hole, aligned them perfectly, put a clamp on it and let it dry. That was ~5 years ago and I've abused the hell out of that machine; the stuff is still holding.")
Oh ya, by the looks of the rest of the bike, a carb/points cleaning likely isn't going to cut it. If it's not seized and the transmission clicks through gears you'll be lucky. As long as there was oil left in the crankcase you might be in luck. I've never had to split cases and by the looks of it putting cases back together isn't fun. Also, finding internals for a bike like that probably isn't easy.
My uncle has an old Honda Trail 70 in the back of his shed. It hasn't moved or had the engine even turned over in about 7 years. I've offered to buy it form him, no go. I've offered just to clean the carb, start it up to keep it form seizing, but he's being a jerk. It makes me sad just to watch a bike wither like that.
Good luck on that rebuild, you are a trooper
Those front forks look corroded beyond being able take them apart and clean them up, oiling etc. Do you think you can find replacements?
The blemish in front of the rear indicator mount is where I had just JB welded a 2mm hole but not sanded back the JB yet.
JB weld is to me what duct tape is to Red Green
That stuff is so strong and handy, it works on everything, including junctions between plastic and metal. The aftermarket carb for my 4-wheeler was supposed to be a direct bolt on, but it just had a round end (for a clamp), whereas the intake on the engine actually has a flange mount. So I took the intake off the engine, and hollowed out the hole with a dremel to fit the round end of the carb in. JB welded the surfaces, put the carb in the hole, aligned them perfectly, put a clamp on it and let it dry. That was ~5 years ago and I've abused the hell out of that machine; the stuff is still holding.
Methinks it's gonna be fun when I open the engine:evil
Oh ya, by the looks of the rest of the bike, a carb/points cleaning likely isn't going to cut it. If it's not seized and the transmission clicks through gears you'll be lucky. As long as there was oil left in the crankcase you might be in luck. I've never had to split cases and by the looks of it putting cases back together isn't fun. Also, finding internals for a bike like that probably isn't easy.
My uncle has an old Honda Trail 70 in the back of his shed. It hasn't moved or had the engine even turned over in about 7 years. I've offered to buy it form him, no go. I've offered just to clean the carb, start it up to keep it form seizing, but he's being a jerk. It makes me sad just to watch a bike wither like that.
Good luck on that rebuild, you are a trooper
RecklessWOT
Bluelight Crew
^ studded tires bro.
I know a guy with a 250 motocross that he has studded tires for use in the winter. He rides the ice where I live.
I ride the ice on my 4-wheeler; I've not been brave enough to do so without that 2nd dimension of stability.
My 4-wheeler is an uncorked 350 warrior so it's got some go. It's great on the ice, to be going full bore and then crank it into a hard fishtail doughnut spin, fun man. Also there a creek that I ride on that meanders (curves), so when you go around it in top gear full throttle you can drift around the long turns sideways around 100k. Ice is fun as hell
It just takes a while to get going without studded tires, once you have momentum it's all good. With studded tires you wouldn't be able to fishtail/doughnut/drift though.
Agreed, I studded the tires on my enduro a few years ago, me and my friend used to take that and his honda 650R out on a lake about 3 or 4 miles from his house. The ride through the deep snow in the fields on the way there was always a bit of a struggle for my underpowered bike, but once you hit the ice that's really fun. I know some people that put trials tires on their bikes and put multiple studs in each lug, but I left the regular old knobbies on and studded them up
was lots of fun. That thing honestly probably handled better on the ice with the studs than it did on a dry road with rubber, digs in so well. I would lean the hell out of that bike at about 50 or 60mph and it would be no problem. I too have a warrior, it's an '01. The thing is a beat piece of shit, but I still had my fair share of fun on a lake last winter. A good friend of mine has a lake house that is right on a lake and my roommate and I would bring the 2 quads over (he has an '04ish Honda Foreman 4x) and just go crazy for hours. There was 1 warm spring that you had to watch out for though, no matter how cold out it was there was this one stupid thin spot that we almost broke through on 2 occasions.
NSFW:

The area we rode in was usually much less snow covered but this was right after a storm and even if there was some we usually had cleared it all out of the way or packed it down. This was when someone strayed away from the well-ridden area into the area that we stayed away from because we knew it was no good
Either way, ice riding is some fun shit!
Last edited:
PepperSocks
Bluelight Crew
Hitting a slush patch sucks. It's not that the ice is too thin, but because of a crack and weight of the snow, water seeps up and makes a ton of slush. Scarry as hell when you hit one, you slow right down and feel like you're going in. That's one thing about ice riding I don't like. It can be unpredictable. The best situation is when the ice is clean with no snow on it. It gets thick and there's no slush.
B1tO'RoughJack
Bluelighter
Riding a shitty 125CC from China right now - getting a new bike between 500-750cc in the New Year. Ride every single day, except I don't think I'll be riding in the ice, tbh, until I got more experience.
RecklessWOT
Bluelight Crew
Riding a shitty 125CC from China right now - getting a new bike between 500-750cc in the New Year. Ride every single day, except I don't think I'll be riding in the ice, tbh, until I got more experience.
Lol what china bike do you have? My very first enduro was a Lifan 200. GY5 I believe it was. The thing was slow as hell but I put an ignition box from a 250R Honda on it and had a 1.25" exhaust which opened it up quite a bit. I also changed out the sprocket from the same Honda 250R, rigged up a rear shock from a Yamaha R1, and built a bracket to complete the missing section of frame under the engine which stopped a lot of vibrations and stiffened it up a lot. For tires I ran a pirelli scorpion up front and a kenda trackmaster in the rear so I could actually take it on some real trails. After some heavy abuse the thing fell to pieces though, just not meant to last. Got one season out of it, woo hoo! Heh, what else can you expect from a brand new bike that only costs $1200?
Jackal
Bluelighter
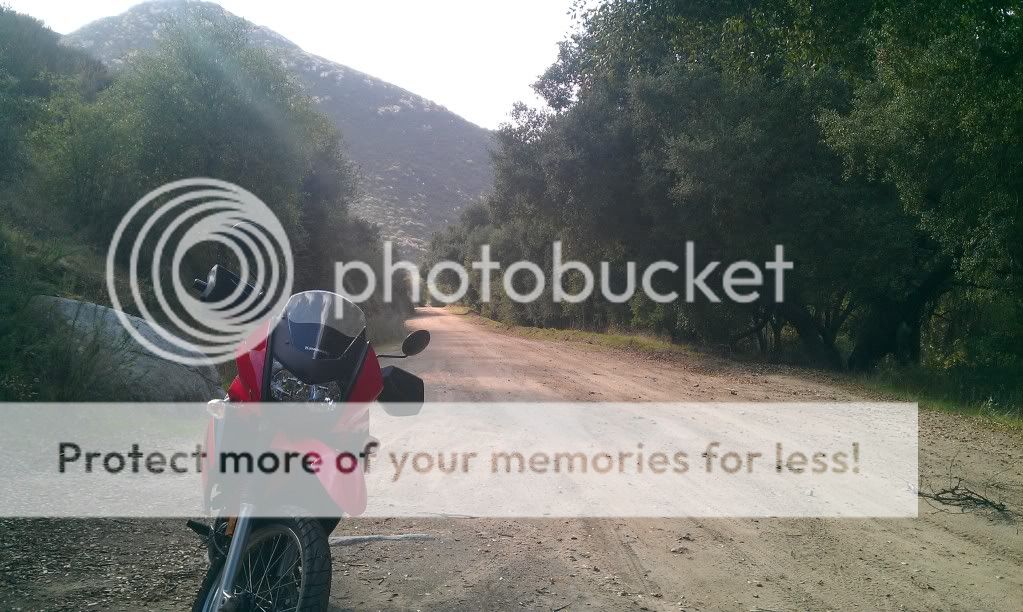
A good day.

matt2012
Bluelighter
I voted yes...only rode a bike in a parking lot when I was 16. my dad took me to learn on his honda CB 750 superspot w/ quarter turn racing throtle8). I popped the clutch and it threw me six feet in the air...I watch from above as my dad grabbed the bike...I got no such treatment and hit the ground hard.
First and last time I rode
First and last time I rode
PepperSocks
Bluelight Crew
Nice terrain and vegetation there Jude; what's your region?
I'll be getting my bike out sometime early May, it's still a bit chilly in Ottawa for riding. The insurance payments coming off my account practically force me to ride the thing.
And I've got a squeaky clean record for the last 8 years since I was 16, insurance companies must be flowing with gravy.
I'll be getting my bike out sometime early May, it's still a bit chilly in Ottawa for riding. The insurance payments coming off my account practically force me to ride the thing.
And I've got a squeaky clean record for the last 8 years since I was 16, insurance companies must be flowing with gravy.
felix
Bluelight Crew
sorry for laughing out loud, but my instincts would have been the same as your dad's. :DI popped the clutch and it threw me six feet in the air...I watch from above as my dad grabbed the bike...I got no such treatment and hit the ground hard.
your scratches will heal up, but the scratches on the bike won't!
definitely coming into motorbike season again here, at last. just need a new rear tyre and mine should be good to pass its MOT test.
(yes, I've become a bit of a fair weather biker in my old age.
 )
)Jackal
Bluelighter
Nice terrain and vegetation there Jude; what's your region?
I'll be getting my bike out sometime early May, it's still a bit chilly in Ottawa for riding. The insurance payments coming off my account practically force me to ride the thing.
And I've got a squeaky clean record for the last 8 years since I was 16, insurance companies must be flowing with gravy.
South East Asian Tropics.
I have had no claim in 8 years too, and the last one wasn't my fault.
Insurance was a very rare thing here until a couple of years ago. I have insured my four. Three comprehensively and one for theft only. Total cost $100p/a