


-
Life Advice & Visual Arts Welcome Guest
Posting Rules Bluelight Rules 🌌 Share Your Dreams! 🌌 📸 15 Years of Photo Contests 📸 -
LAVA Moderator: Shinji Ikari
You are using an out of date browser. It may not display this or other websites correctly.
You should upgrade or use an alternative browser.
You should upgrade or use an alternative browser.
Photography Photography Thread vs. BL Shutterbugs unite!
- Thread starter BA
- Start date


hydroazuanacaine
bluelighter
- Joined
- May 17, 2007
- Messages
- 8,493
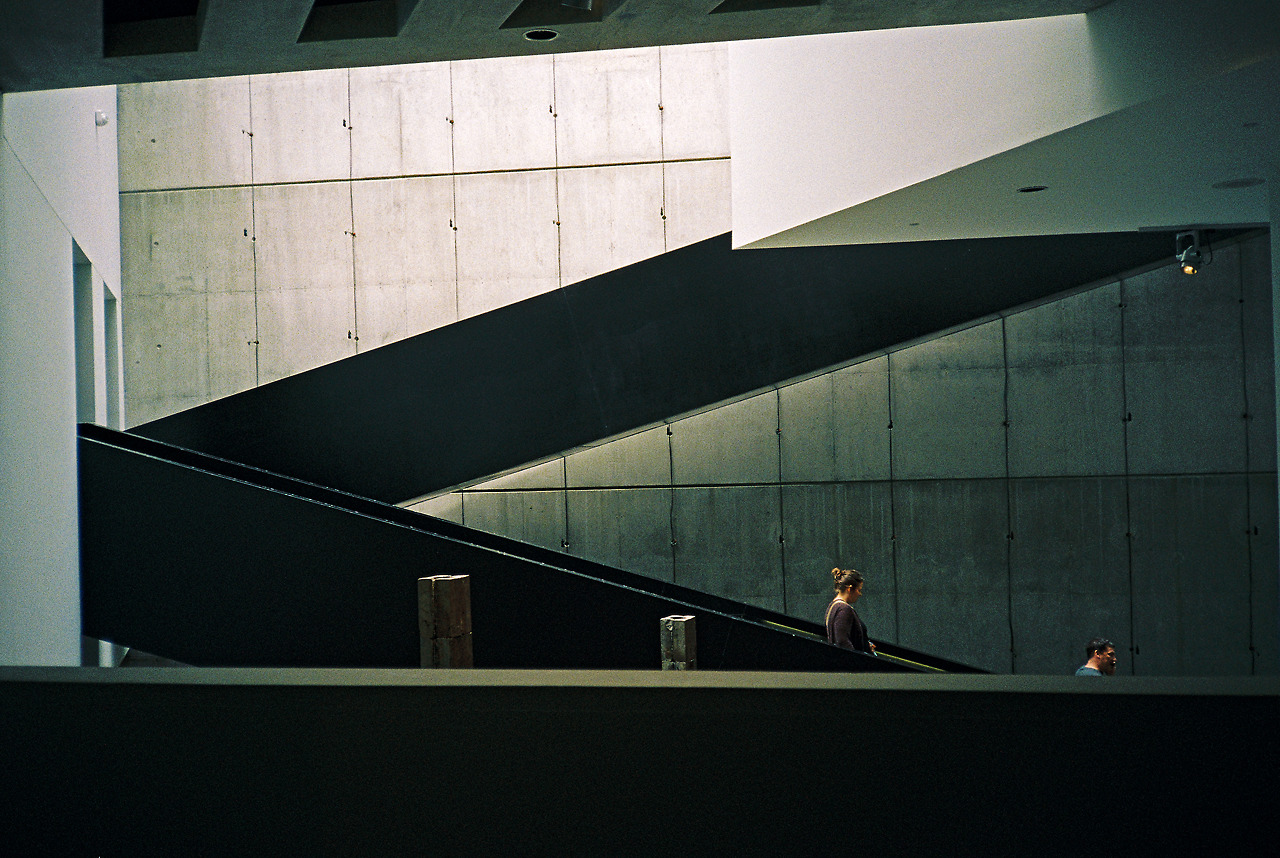
pleasant shot, Sadie. reminds me of abstract art that’s a canvas very simply painted two or three colors. like a solid background with a stripe or off center dot in another color.
this is a good thing you’ve got going on.
NSFW:
NSFW:
NSFW:
this is a good thing you’ve got going on.
Last edited:
hydroazuanacaine
bluelighter
- Joined
- May 17, 2007
- Messages
- 8,493
one of my favorites off most recent roll. kodak portra 800 through an olympus xa.
undead
Greenlighter
^ Always solid. I really dig the vibe of the last shot you shared. The colors, tone, etc. it's all excellent!
Zopiclone bandit... I'm really digging the stuff you're sharing a lot!
I haven't been in this thread in a long time. Possibly since it was in Second Opinion. Glad to see it's still around!
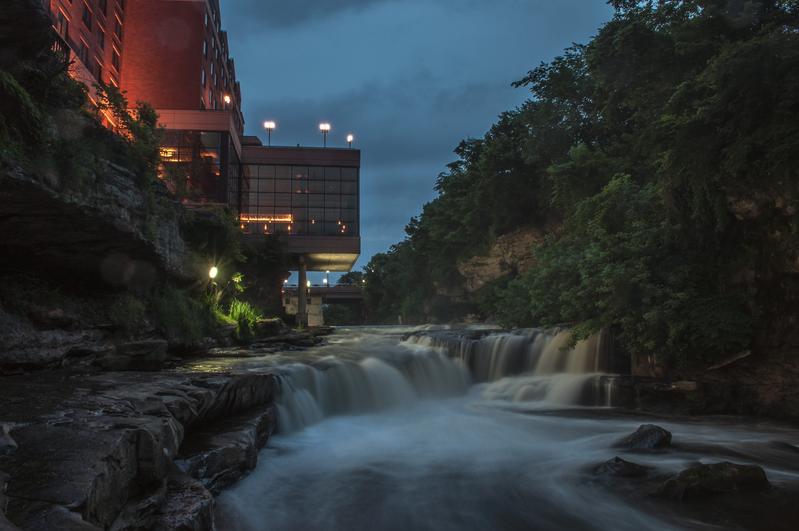
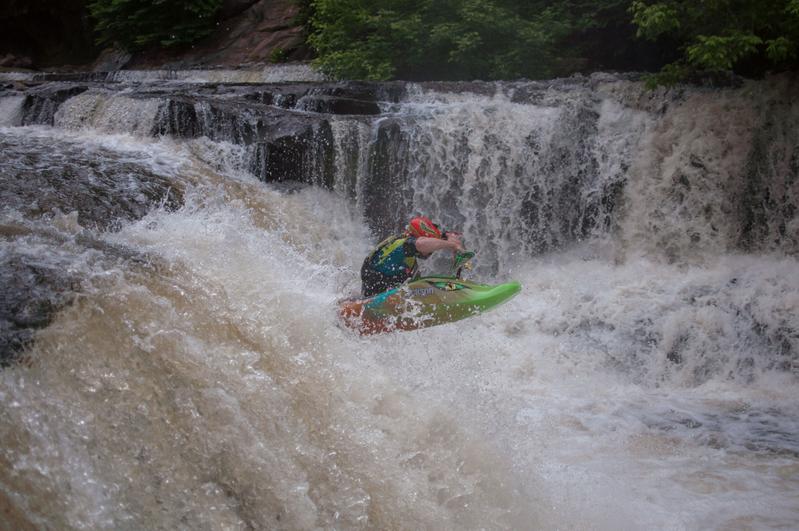
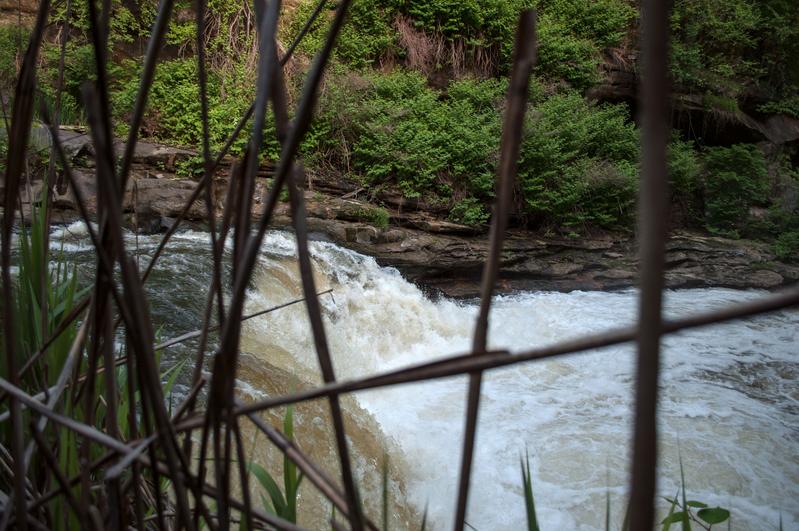
Here's a few shots from my local jam session with a buddy of mine on our local river. Sometimes, I can't decide if I have more fun in my kayak or behind my camera, but I can assure you, they're both extremely rewarding.")

Zopiclone bandit... I'm really digging the stuff you're sharing a lot!
I haven't been in this thread in a long time. Possibly since it was in Second Opinion. Glad to see it's still around!
Here's a few shots from my local jam session with a buddy of mine on our local river. Sometimes, I can't decide if I have more fun in my kayak or behind my camera, but I can assure you, they're both extremely rewarding.
Last edited:
phenethylo J
Bluelight Crew
- Joined
- Jul 23, 2010
- Messages
- 4,930
hydroazuanacaine
bluelighter
- Joined
- May 17, 2007
- Messages
- 8,493
^lush.
photography combines well with other hobbies. nice kayaking shots, undead. top one is my favorite.
polaroid originals (fka impossible project) no longer makes spectra film. because it jams in the cameras. it always has; them deciding they're not gonna make it anymore because is new. down to my last few packs and they're getting old.
i got the fancy spectra, a minolta instant pro, a few months ago. used it for real the first time this afternoon. it has a coated glass lens and a digital menu that allows for things such as rudimentary manual focus. it's the same lens and menu as the polaroid spectra pro, only the minolta is said to be a better build and that looks to be the case to me. i know the hand strap on the polaroid version is garbage from other polaroid models that have a similar part. anyway, i was hoping it?s sturdier build would override the jamming problem. no. hence the strange blue burns on the below photos.
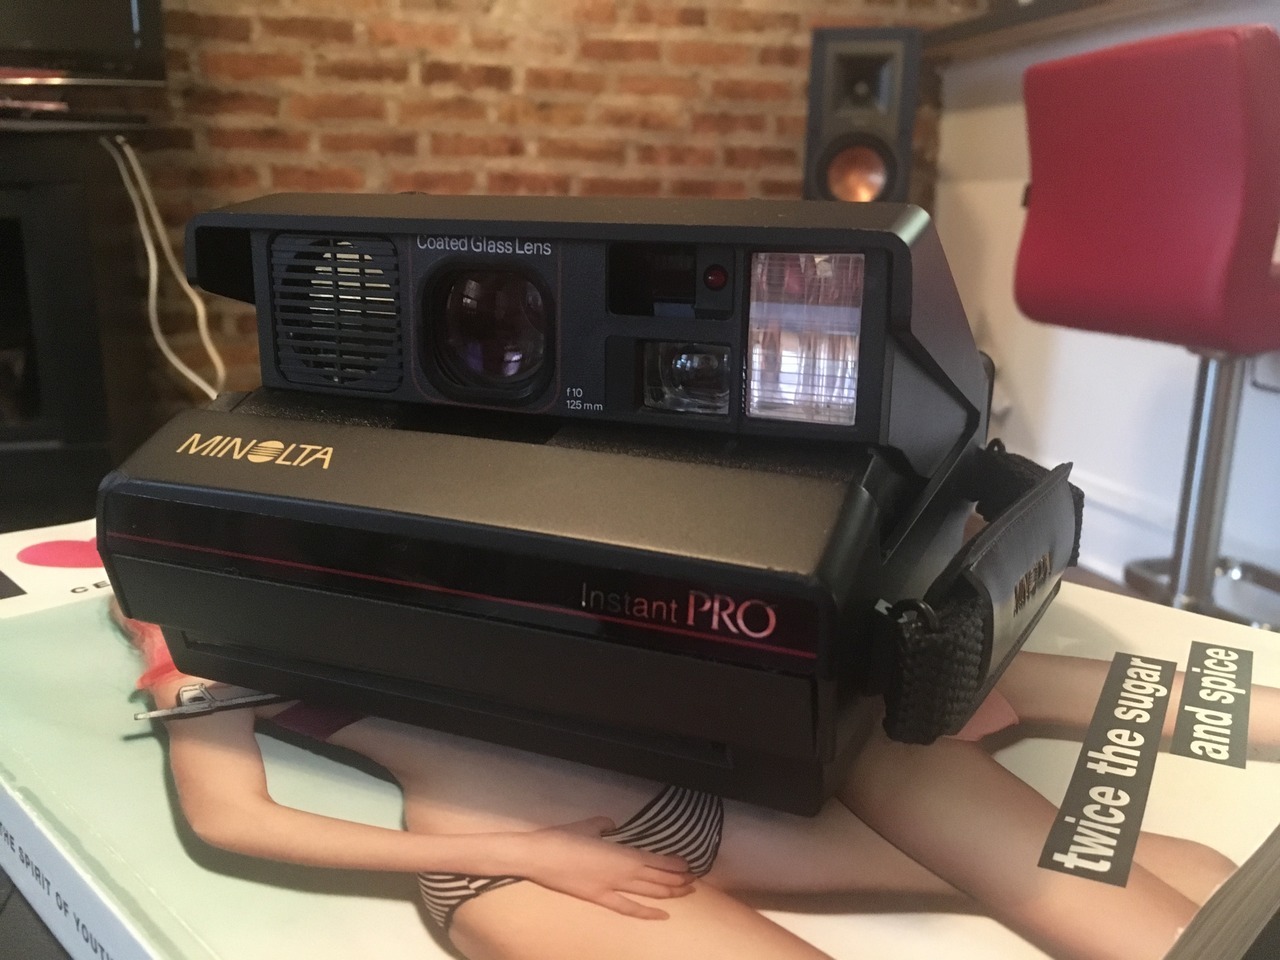
meet kira ...
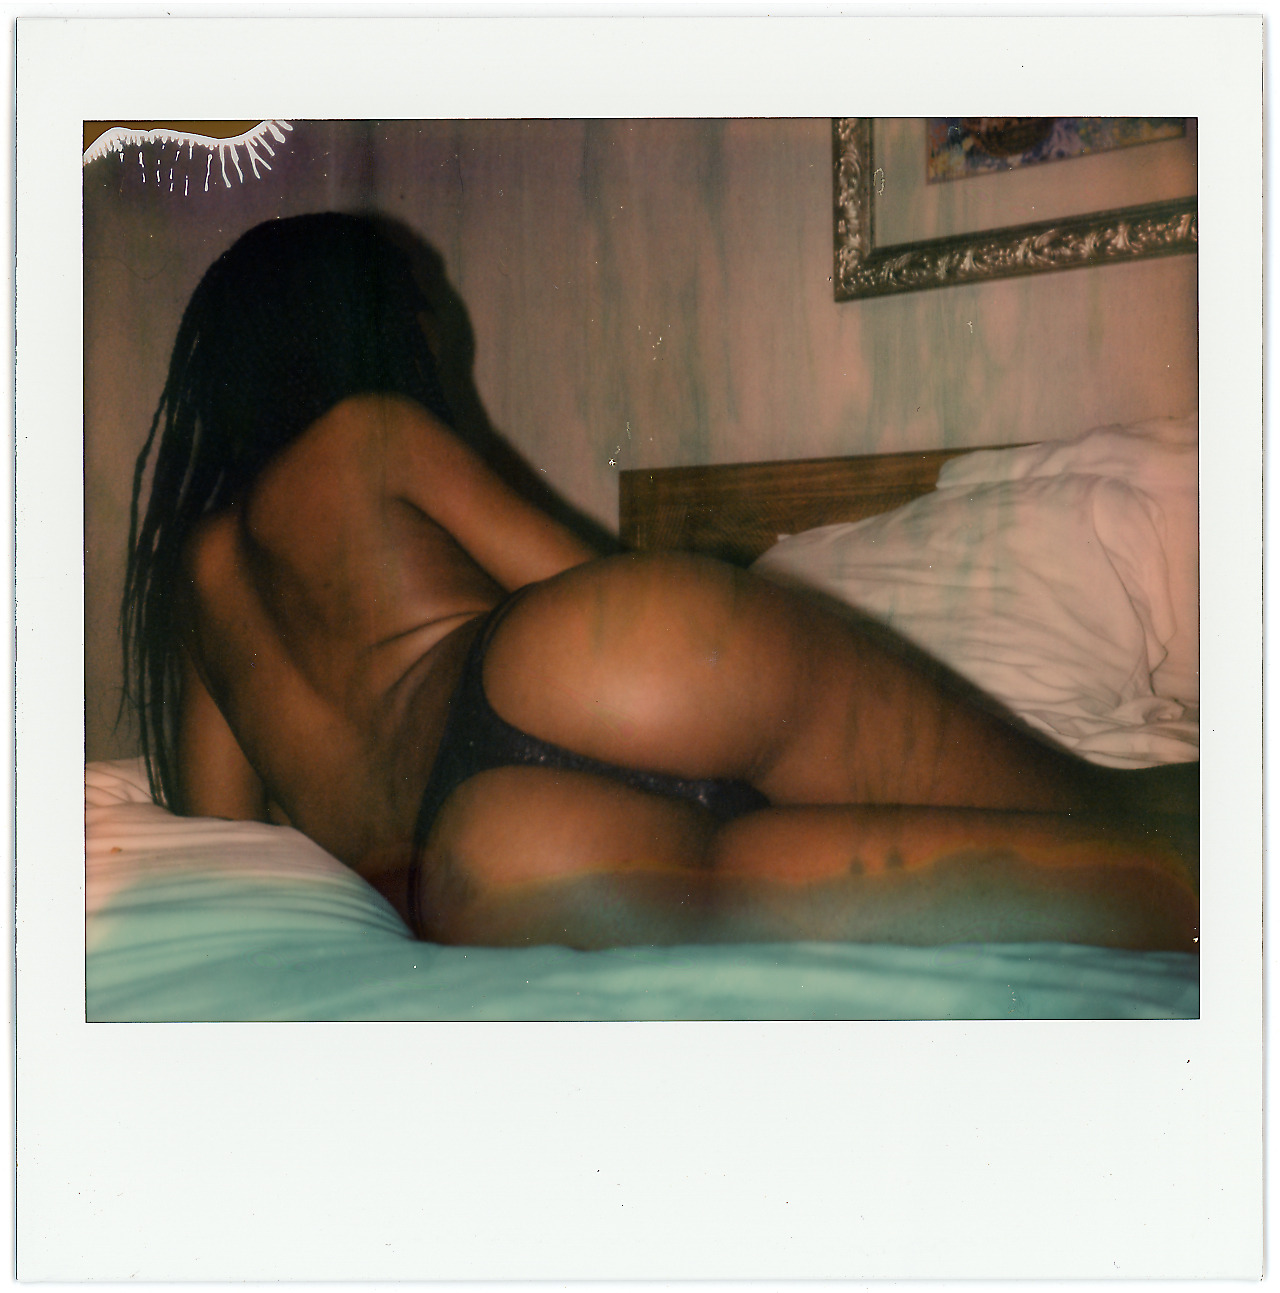
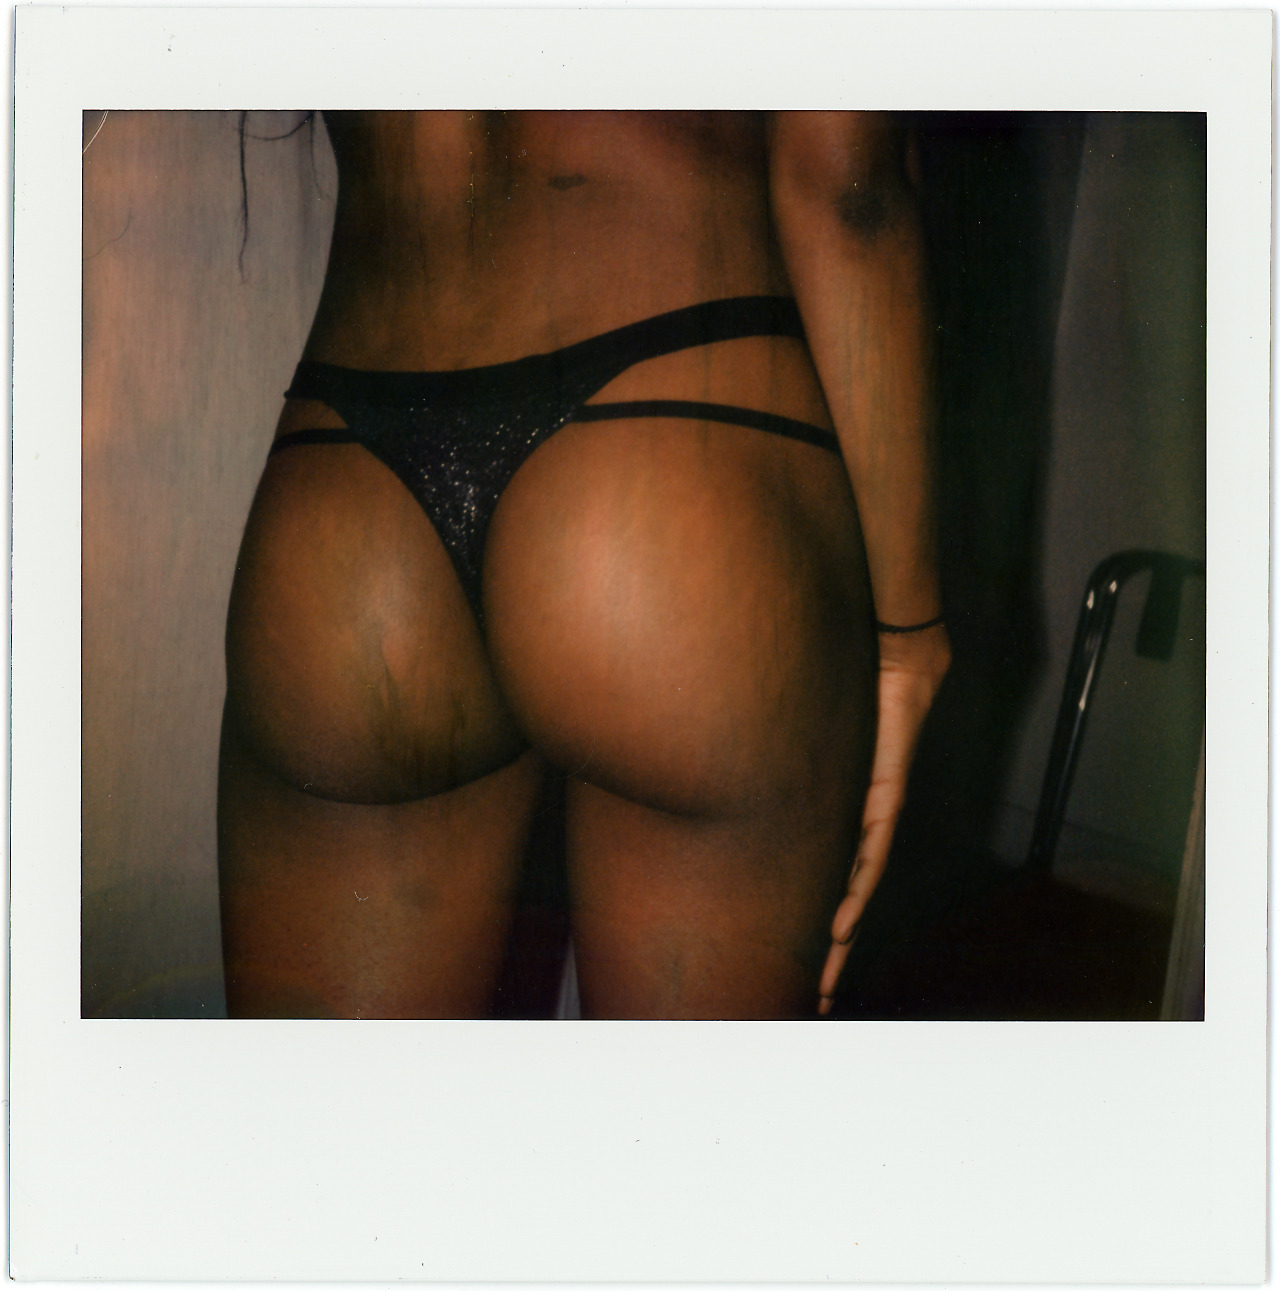
though kira doesn't usually pose for photos, she's making a special exception this evening. nineteen in february.
photography combines well with other hobbies. nice kayaking shots, undead. top one is my favorite.
polaroid originals (fka impossible project) no longer makes spectra film. because it jams in the cameras. it always has; them deciding they're not gonna make it anymore because is new. down to my last few packs and they're getting old.
i got the fancy spectra, a minolta instant pro, a few months ago. used it for real the first time this afternoon. it has a coated glass lens and a digital menu that allows for things such as rudimentary manual focus. it's the same lens and menu as the polaroid spectra pro, only the minolta is said to be a better build and that looks to be the case to me. i know the hand strap on the polaroid version is garbage from other polaroid models that have a similar part. anyway, i was hoping it?s sturdier build would override the jamming problem. no. hence the strange blue burns on the below photos.
meet kira ...
though kira doesn't usually pose for photos, she's making a special exception this evening. nineteen in february.
Last edited:
Xorkoth
Bluelight Crew
Beautiful.
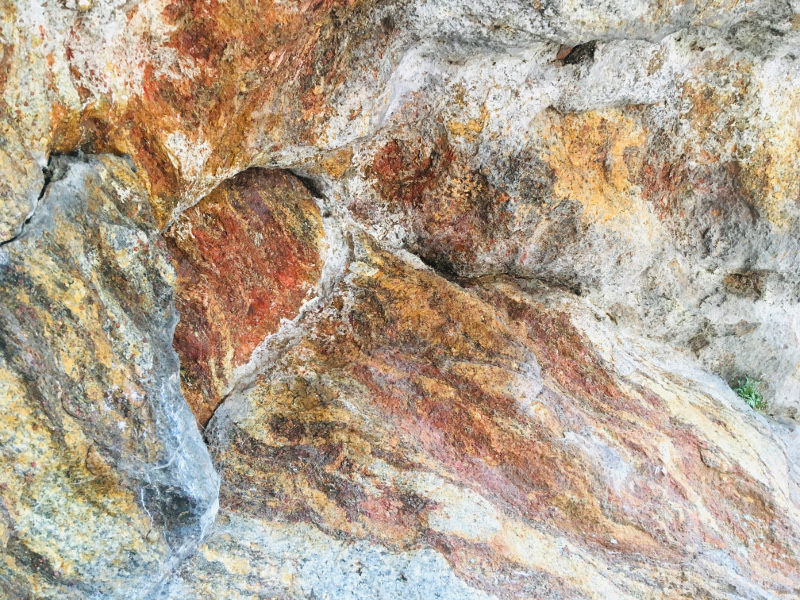
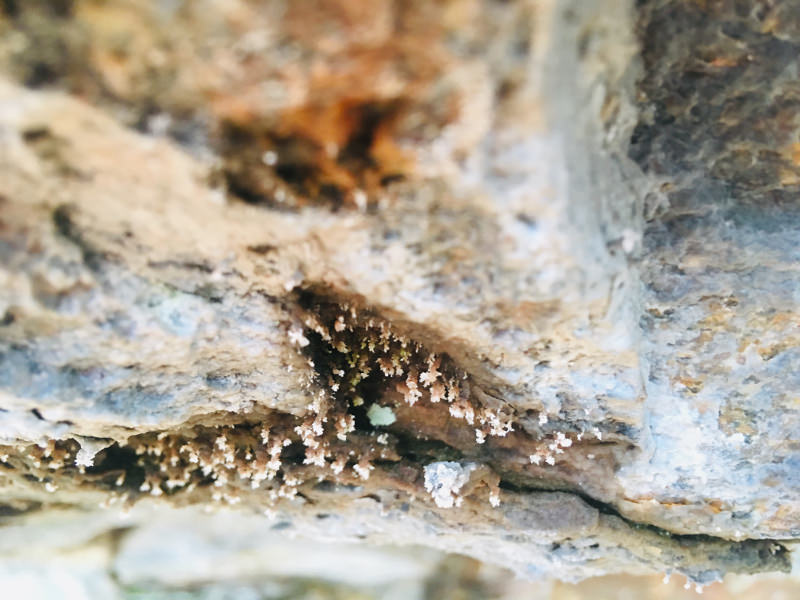
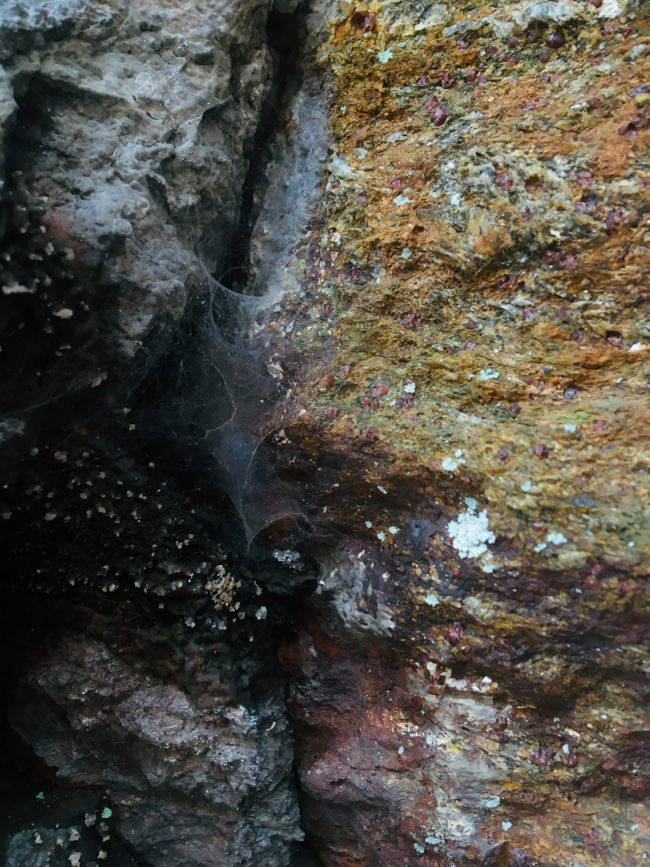
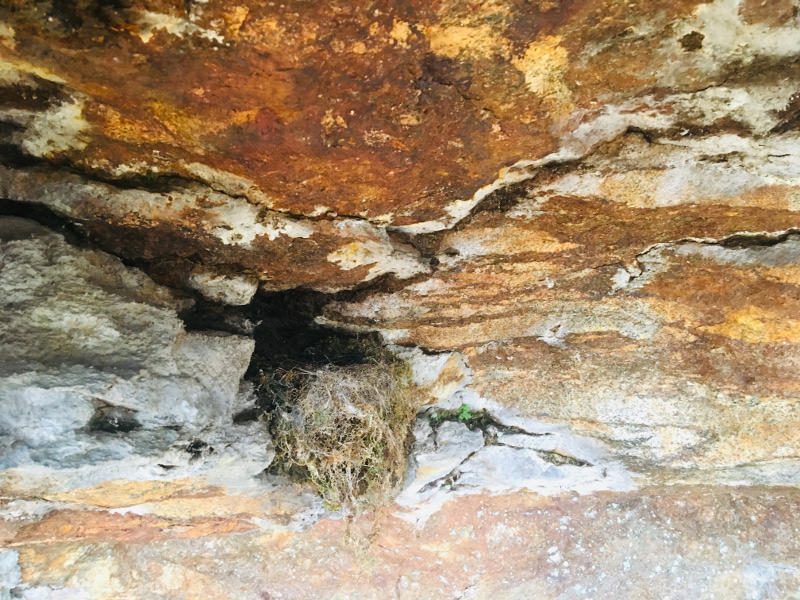
My friend and I were hiking last weekend and we found this really cool little cave. It had some of the most colorful and interesting rock I've ever seen. It had these little purple gems all mixed into the rock. Some of the rock had already fallen and was crumbly and we spent about an hour digging the gems out. It also had these really strange rock growths that looked like coral polyps, never seen anything like them.
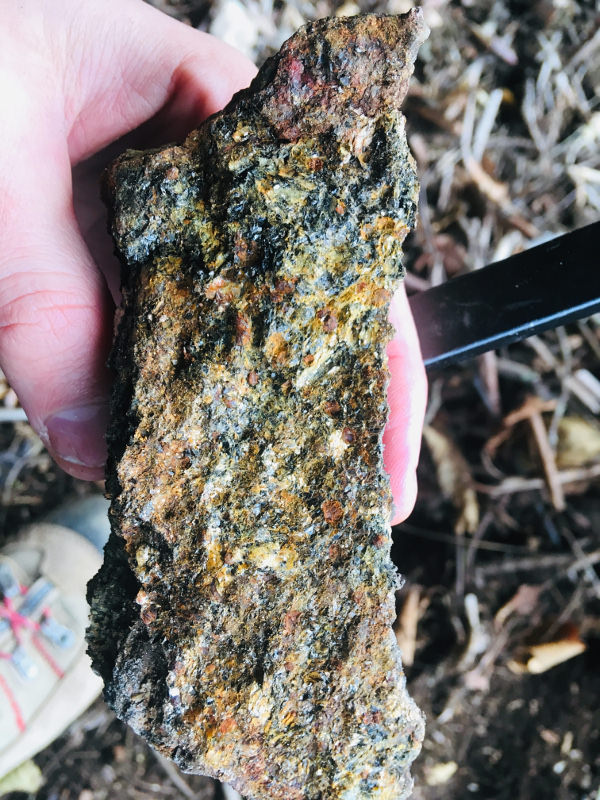
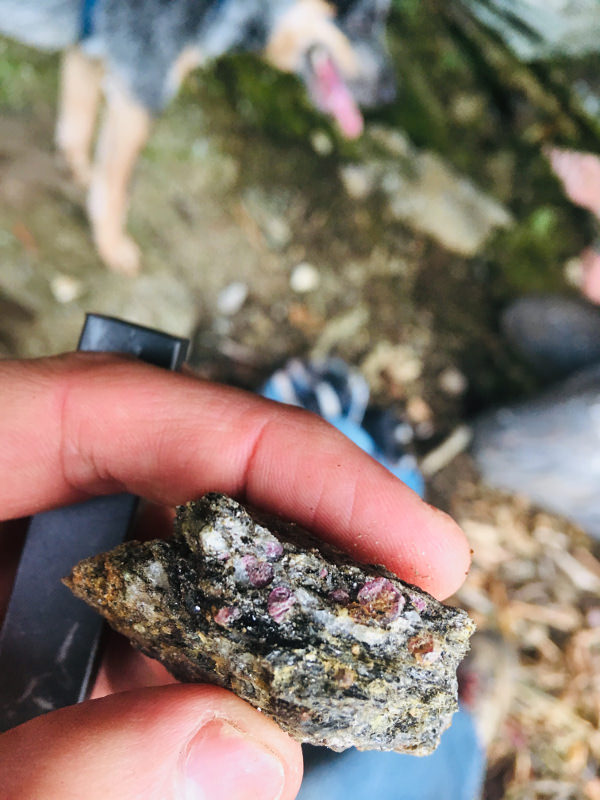
My friend and I were hiking last weekend and we found this really cool little cave. It had some of the most colorful and interesting rock I've ever seen. It had these little purple gems all mixed into the rock. Some of the rock had already fallen and was crumbly and we spent about an hour digging the gems out. It also had these really strange rock growths that looked like coral polyps, never seen anything like them.
Xorkoth
Bluelight Crew
Oh yeah lots of mica where I am, and quartz too.
Tubbs
Bluelight Crew
Good golly it's a Thujone.... a rare beast indeed. Lol
hydroazuanacaine
bluelighter
- Joined
- May 17, 2007
- Messages
- 8,493
love the last rock, Shadowmeister. finding that would make me feel like a real scientist.
thanks, thujone.
starting tomorrow, tumblr will no longer allow nudity. including "female-presenting nipples." for some reason this is often mentioned in the same breath as fosta/sesta, but that doesn't make sense. it's not like the whole of section 230 is being repealed. more like tumblr is following the example of "they/their" more profitable competitors, pinterest and instagram. anyway, it's representative of an attack on photography. image sharing platforms banning nudity is so inane it makes my head spin. soon the internet will consist of nothing but mock-step-sibling porn and smartphone pictures of dogs -- what the people want.
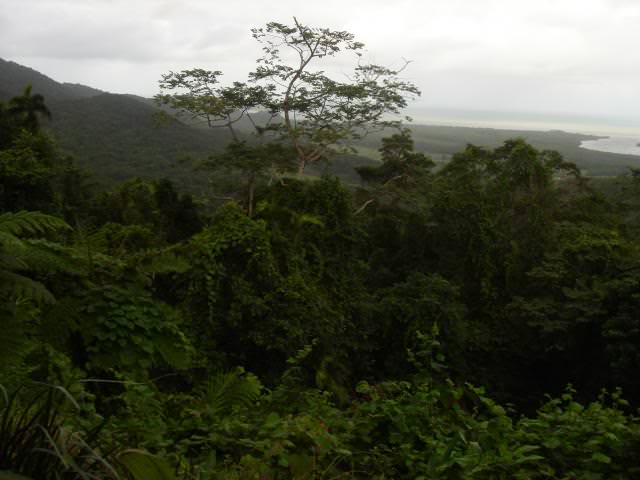
recently shot a roll of severely expired kodak gt/max 800 at box speed. you're supposed to take off an f stop for every decade. didn't want to and had never had a problem with expired film. high speed film degrades much faster than normal and the roll came back as grainy, low-contrast garbage. which sucks because it included a candid shot of my youngest brother showing our 97-year-old grandma how to grill doves. there is one photo on the roll that the effect complimented ...

taken as i wandered around looking for an open market in my new city.
thanks, thujone.
starting tomorrow, tumblr will no longer allow nudity. including "female-presenting nipples." for some reason this is often mentioned in the same breath as fosta/sesta, but that doesn't make sense. it's not like the whole of section 230 is being repealed. more like tumblr is following the example of "they/their" more profitable competitors, pinterest and instagram. anyway, it's representative of an attack on photography. image sharing platforms banning nudity is so inane it makes my head spin. soon the internet will consist of nothing but mock-step-sibling porn and smartphone pictures of dogs -- what the people want.
recently shot a roll of severely expired kodak gt/max 800 at box speed. you're supposed to take off an f stop for every decade. didn't want to and had never had a problem with expired film. high speed film degrades much faster than normal and the roll came back as grainy, low-contrast garbage. which sucks because it included a candid shot of my youngest brother showing our 97-year-old grandma how to grill doves. there is one photo on the roll that the effect complimented ...
taken as i wandered around looking for an open market in my new city.
Last edited:
hydroazuanacaine
bluelighter
- Joined
- May 17, 2007
- Messages
- 8,493
figured out a new way to scan and edit. a "linear scan." i do not know what that means, but it involved scanning the piece of film without the scanning software making any modifications. so if you scan a negative, it's like a super detailed photo of the negative. if it's a positive, it does nothing to tighten up than positive in anyway. you do it all in post in whatever post program you may use, photoshop myself.
in addition, i have access to a new high end scanner. currently manufactured scanners are garbage except for hasselblads which are $20k. all professional film scanners are vintage electronics equipment, which is a pain in the ass. before moving i had made friends with an employee at the lab i used for developing, and he scanned my rolls (as high res tiffs) with his through their lab scanner. this worked pretty well but not for all film types, definitely not for positive/slide film. and it wouldn't do medium format. this new scanner that you can pay by the hour to use at a nonprofit is a kodak creo. it's a flatbed, which at first i was doubtful of, but it's solid.
i was talking to the executive director at the nonprofit and she made mention of "linear scans." so i came in the next day to use it and a lab assistant showed me how to use it. the process was like a consumer flatbed. but i peaked at some of the folders on the desktop and they were scanning unmodified. so i asked about it and he said that's not the way to do it and then his coworker disagreed and then the lab director came in and said it's great but unnecessary. so i tried it with a frame and pulled it into photoshop and it's so much better.
then at home i figured out a whole new way to color correct these scans once they inverted. by going into levels and tightening them each channel or whatever red, green, and blue are called. instead of just using the color balance sliders (though i still go in after and create a layer that way too).
the end product exceeds the quality of the fuji lab scanner and gives much, much more user control. an example ...

the halation is because it's cinestill. it's 35mm motion film converted for still. they remove the anti-halation layer because it fucks up in c-41 processing. the white spots are dust i didn't bother to remove is ps because i'm not gonna print that photo or do anything more with it. it's just the first photo off the roll (that wasn't burned by light during loading). some of the later shots will even better illustrate this technique's potential.
and here's an example of fujifilm velvia 100, which previously i considered completely unscannable. still looks a billion times better projected, but ...

here's the same slide the the fuji lab scanner, which is an amazing scanner ...
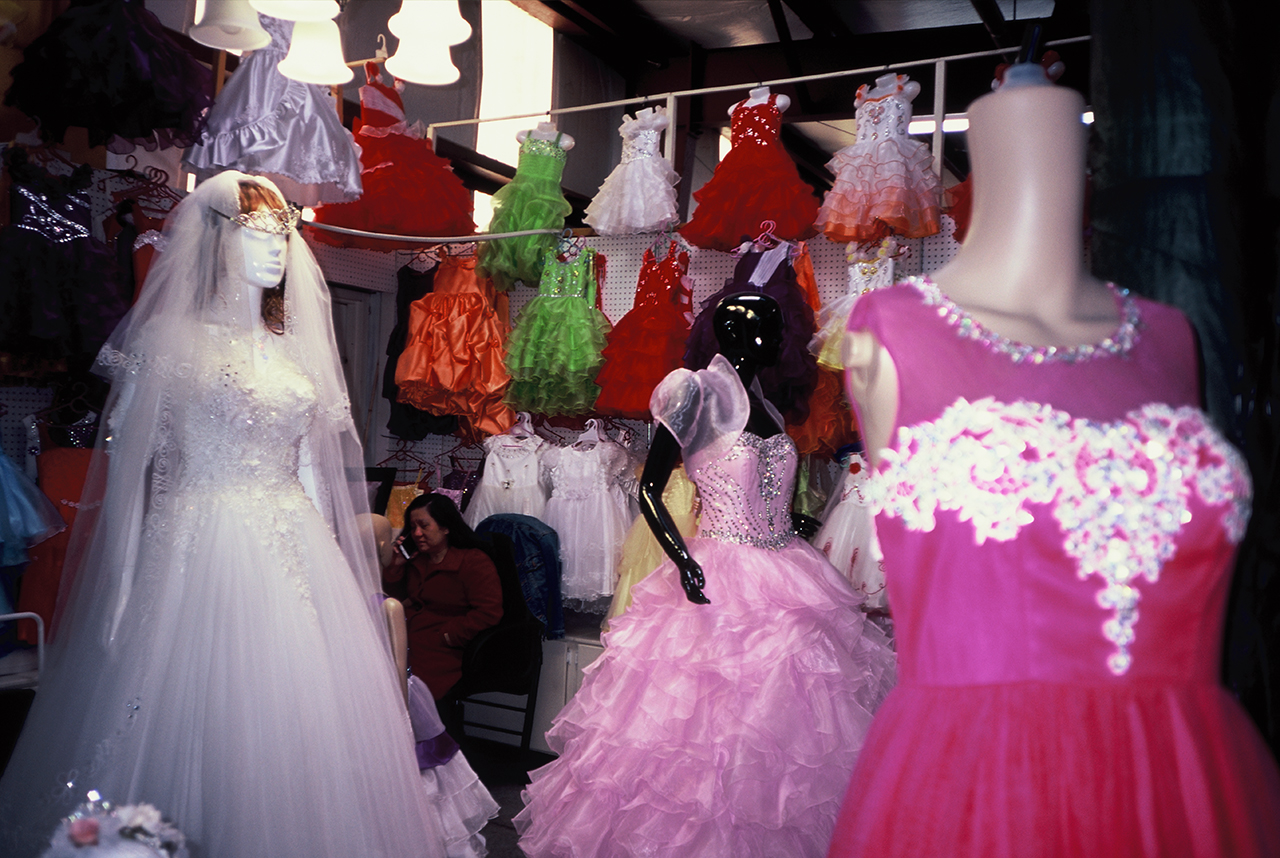
i'm not so much talking about the purple cast as that can be fixed in ps -- in a way, you can correct but the results won't be like the actual slide -- but the shadow detail. the fuji scanner can't handle the slide shadows around her face or with the purple dresses hanging in the left corner. though looking at it now i see the fuji did a way better job with the highlight details like the pink dress and gemstones.
so i take it back. the creo ruins slides too. fuck scanning slide film. it just doesn't work. neither of these look like the projected slide. the fuji destroys the shadows and the creo destroys the highlights. even if the filled in each others' weaknesses, it would still pales in comparison to the actual look of velvia film. i do figure some of this is user error, but digital as a medium hurts photography. some swear by print, but i say projection is the most beautiful.
they have a drum scanner at this lab too, which i'd never seen in person before. maybe that can do slide film.
anyway. this lab should be a good thing. meeting other analog photographers and learning print and scan techniques from them will allow me to improve at a much faster rate then the bubble in which i've been trying to figure things out. plus they have professional equipment you can use yourself.
in addition, i have access to a new high end scanner. currently manufactured scanners are garbage except for hasselblads which are $20k. all professional film scanners are vintage electronics equipment, which is a pain in the ass. before moving i had made friends with an employee at the lab i used for developing, and he scanned my rolls (as high res tiffs) with his through their lab scanner. this worked pretty well but not for all film types, definitely not for positive/slide film. and it wouldn't do medium format. this new scanner that you can pay by the hour to use at a nonprofit is a kodak creo. it's a flatbed, which at first i was doubtful of, but it's solid.
i was talking to the executive director at the nonprofit and she made mention of "linear scans." so i came in the next day to use it and a lab assistant showed me how to use it. the process was like a consumer flatbed. but i peaked at some of the folders on the desktop and they were scanning unmodified. so i asked about it and he said that's not the way to do it and then his coworker disagreed and then the lab director came in and said it's great but unnecessary. so i tried it with a frame and pulled it into photoshop and it's so much better.
then at home i figured out a whole new way to color correct these scans once they inverted. by going into levels and tightening them each channel or whatever red, green, and blue are called. instead of just using the color balance sliders (though i still go in after and create a layer that way too).
the end product exceeds the quality of the fuji lab scanner and gives much, much more user control. an example ...
the halation is because it's cinestill. it's 35mm motion film converted for still. they remove the anti-halation layer because it fucks up in c-41 processing. the white spots are dust i didn't bother to remove is ps because i'm not gonna print that photo or do anything more with it. it's just the first photo off the roll (that wasn't burned by light during loading). some of the later shots will even better illustrate this technique's potential.
and here's an example of fujifilm velvia 100, which previously i considered completely unscannable. still looks a billion times better projected, but ...
here's the same slide the the fuji lab scanner, which is an amazing scanner ...
i'm not so much talking about the purple cast as that can be fixed in ps -- in a way, you can correct but the results won't be like the actual slide -- but the shadow detail. the fuji scanner can't handle the slide shadows around her face or with the purple dresses hanging in the left corner. though looking at it now i see the fuji did a way better job with the highlight details like the pink dress and gemstones.
so i take it back. the creo ruins slides too. fuck scanning slide film. it just doesn't work. neither of these look like the projected slide. the fuji destroys the shadows and the creo destroys the highlights. even if the filled in each others' weaknesses, it would still pales in comparison to the actual look of velvia film. i do figure some of this is user error, but digital as a medium hurts photography. some swear by print, but i say projection is the most beautiful.
they have a drum scanner at this lab too, which i'd never seen in person before. maybe that can do slide film.
anyway. this lab should be a good thing. meeting other analog photographers and learning print and scan techniques from them will allow me to improve at a much faster rate then the bubble in which i've been trying to figure things out. plus they have professional equipment you can use yourself.
haha that cross looks bitchin! i love the composition, the shadows off the fence give it a nice sense of depth.
film really is better than digital, even "oops" moments end up adding an artistic touch to the end result that the consistency of algorithms can't match. that's some interesting stuff about the scanning, looks like Creo was its own company that specialized in film to digital and was acquired by Kodak. thanks for droppin knowledge
I've only got an HP photo scanner, it's not that great but it works, there's a few albums of old Kodak 35mm that I'm planning to digitize soon so I'll post some of those when I get my hands on em
hydroazuanacaine
bluelighter
- Joined
- May 17, 2007
- Messages
- 8,493
^very much looking forward to seeing them.
interesting bit about creo being acquired by kodak.
another off the same roll of cinestill 800t. the flatbed scanner with an autofocus lens (no film holders required) allows for scans that include the sprockets and coding ...
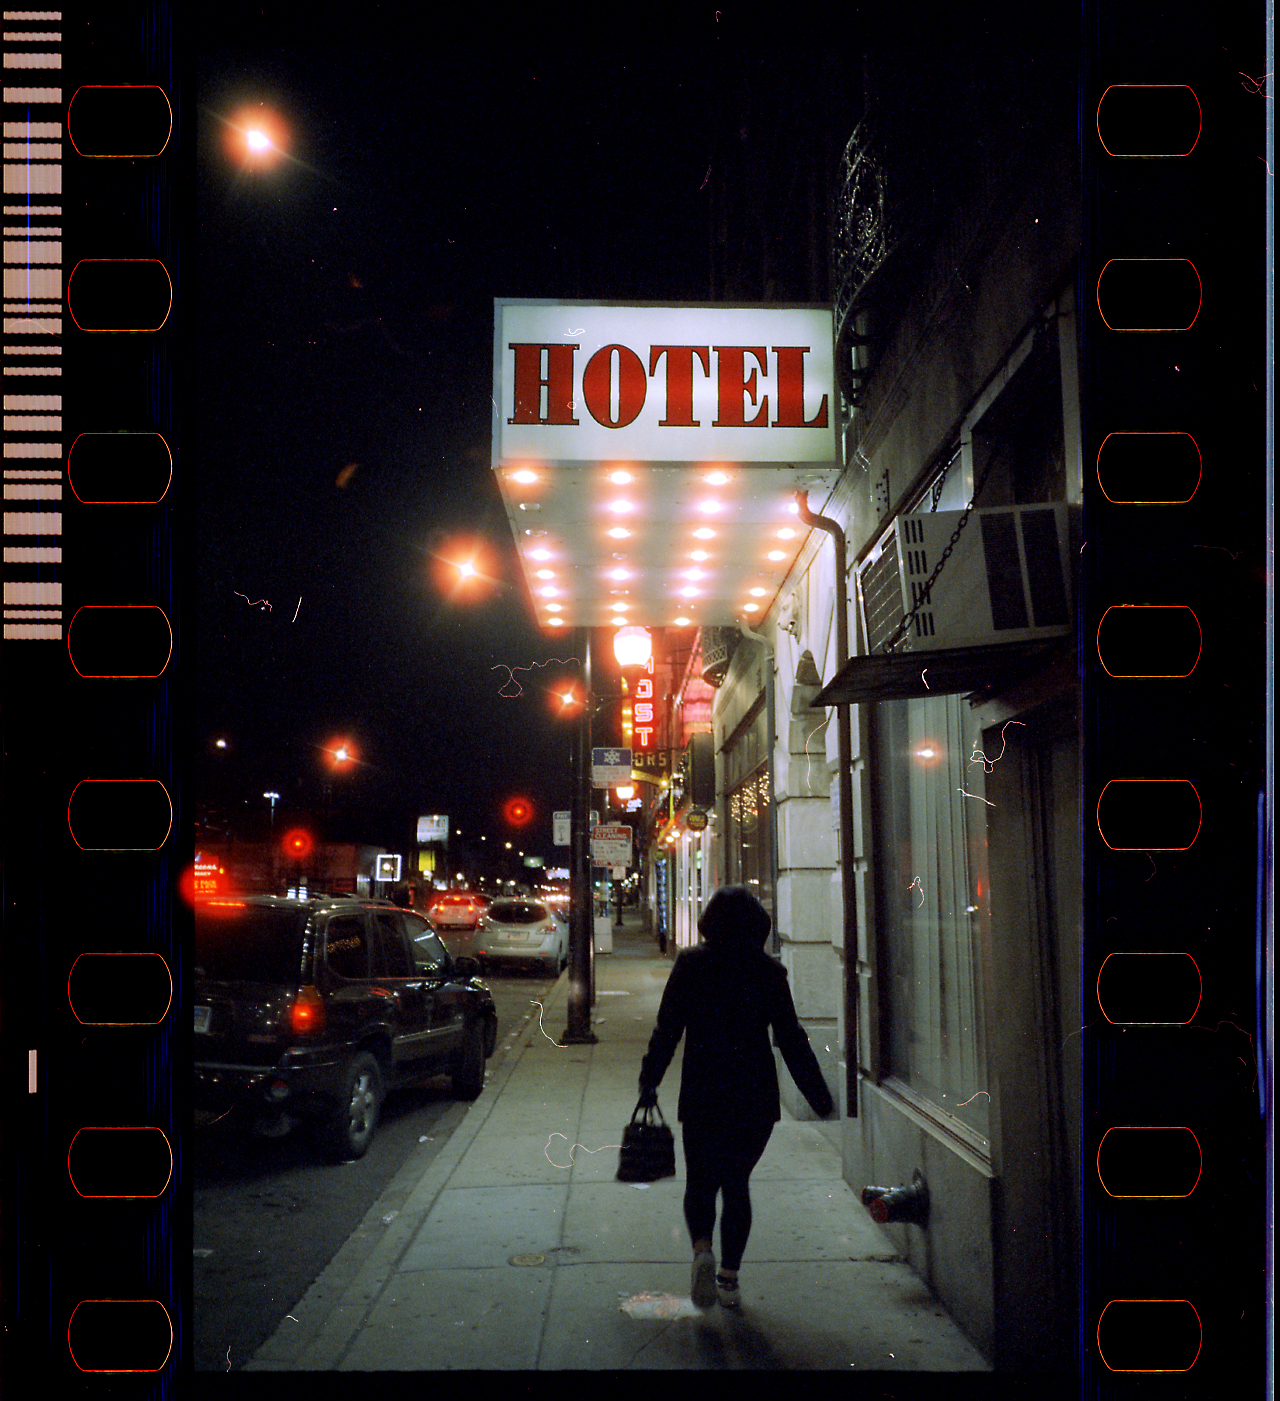
cropped to just the image and a bit cleaned up ...
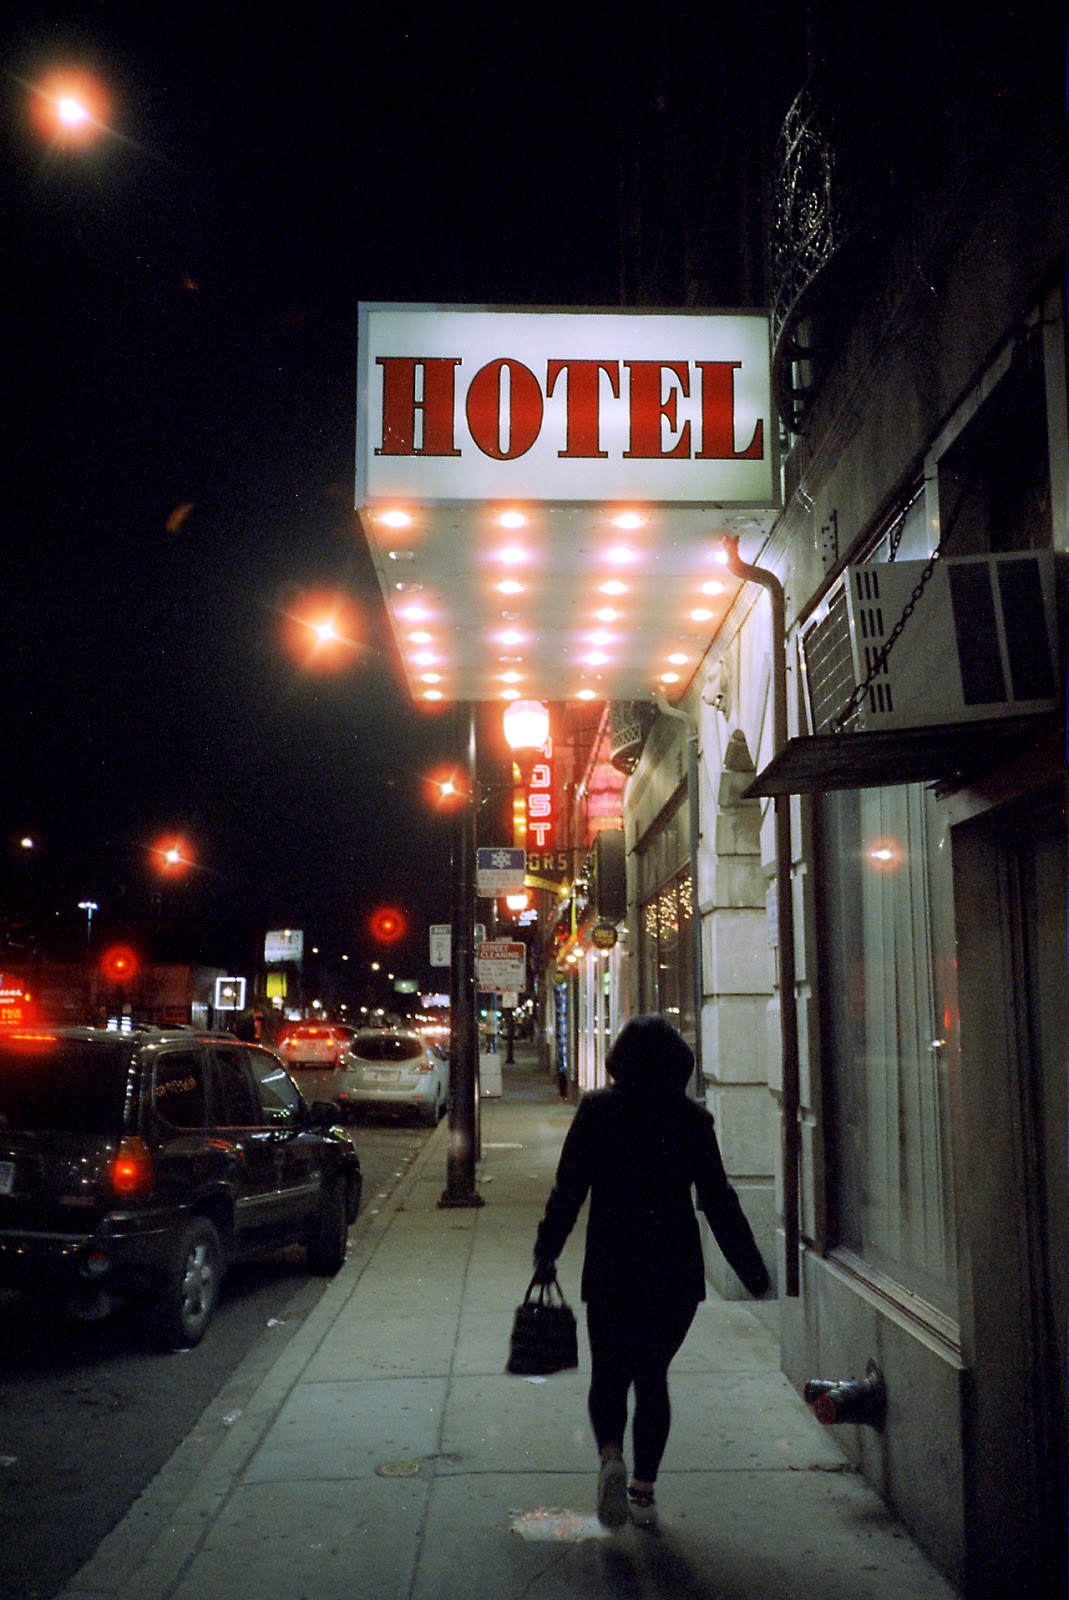
otherwise the same edit of levels, curve, color balance, and unsharp mask
interesting bit about creo being acquired by kodak.
another off the same roll of cinestill 800t. the flatbed scanner with an autofocus lens (no film holders required) allows for scans that include the sprockets and coding ...
cropped to just the image and a bit cleaned up ...
NSFW:
otherwise the same edit of levels, curve, color balance, and unsharp mask
Xorkoth
Bluelight Crew
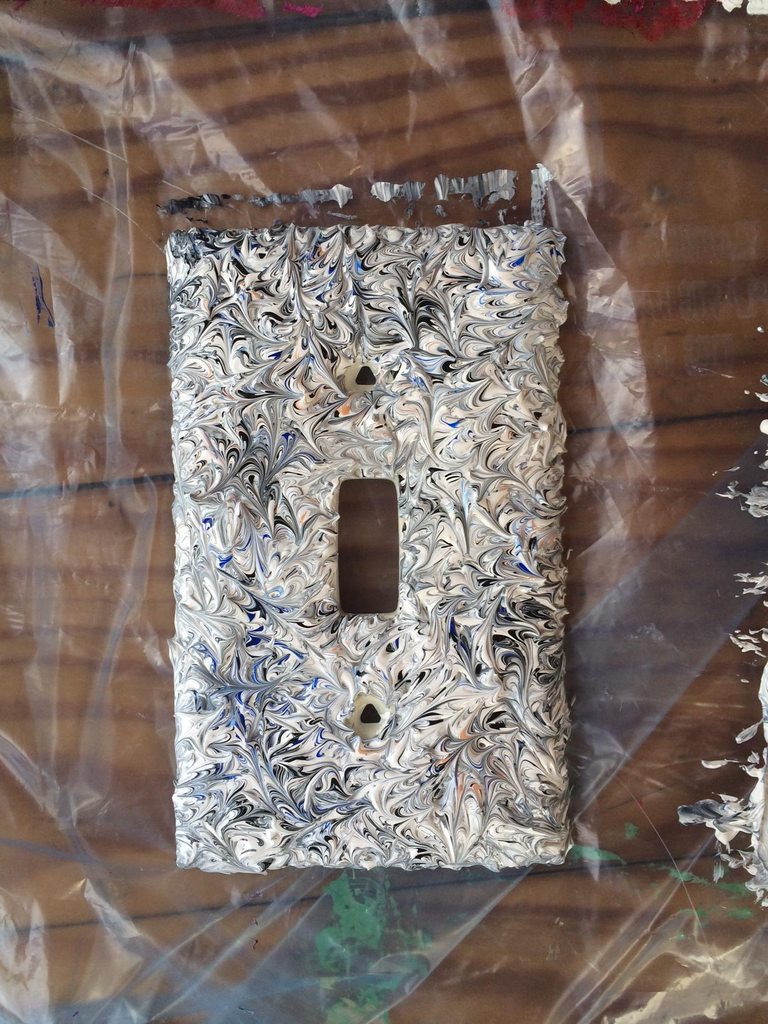
This is a lightswitch cover I painted, before I took an art break I was trying to sell these.
hydroazuanacaine
bluelighter
- Joined
- May 17, 2007
- Messages
- 8,493
nice. reminds me of a photo series you posted a while back. of water that you were making ripples in over a paint design. are you done with your art break?
today i updated my 2011 macbook air to a 15" macbook pro with a 1tb ssd. the air did me well in school as a creative writing major, but was not suited for photo editing. my 35mm scans get up past a gb once the editing starts, and medium format scans can be a gb before i even add layers. meaning i always had to have an external drive out when working and would have to wait as the computer struggled to open files in ps. plus trying to get the screen accurate was futile. while i wanted to get away from mac, these macbook pros have the most accurate screen (of consumer laptops) once calibrated. plus it was no more expensive than a pc because it's a mid 2017 and was over $1k off with an instant rebate. i'm excited.
today i updated my 2011 macbook air to a 15" macbook pro with a 1tb ssd. the air did me well in school as a creative writing major, but was not suited for photo editing. my 35mm scans get up past a gb once the editing starts, and medium format scans can be a gb before i even add layers. meaning i always had to have an external drive out when working and would have to wait as the computer struggled to open files in ps. plus trying to get the screen accurate was futile. while i wanted to get away from mac, these macbook pros have the most accurate screen (of consumer laptops) once calibrated. plus it was no more expensive than a pc because it's a mid 2017 and was over $1k off with an instant rebate. i'm excited.
Last edited:
Xorkoth
Bluelight Crew
I'm not, well, I'm thinking about it again, but haven't done anything yet. I have a 3 foot by 3 foot canvas I want to paint but I need to do some smaller ones first to get back in the groove.
Here's that image, and one of a glass of water on a metal grate rippling from me stomping my foot:
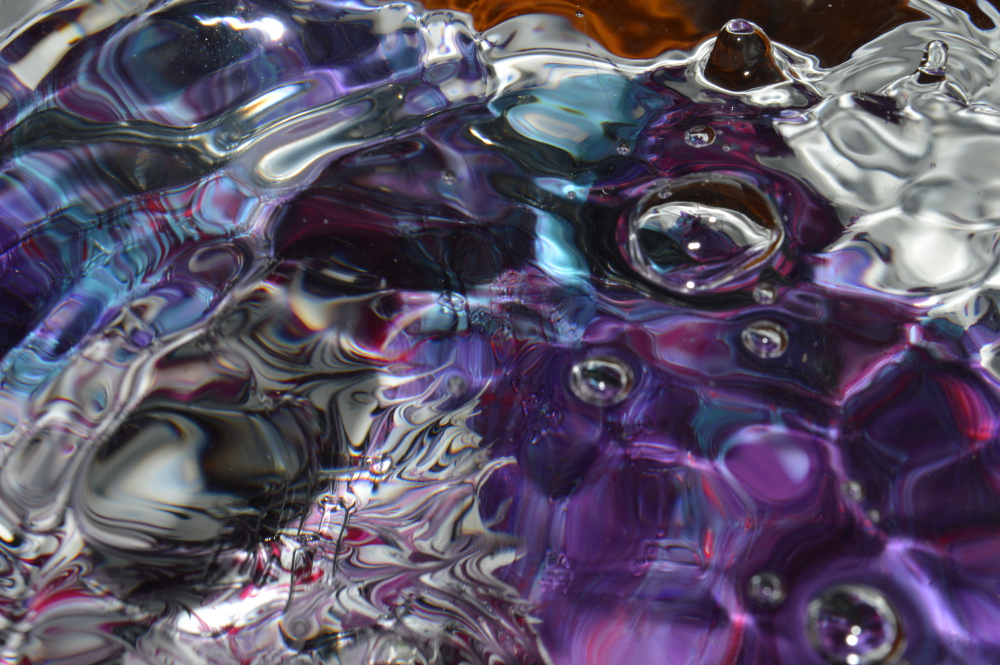
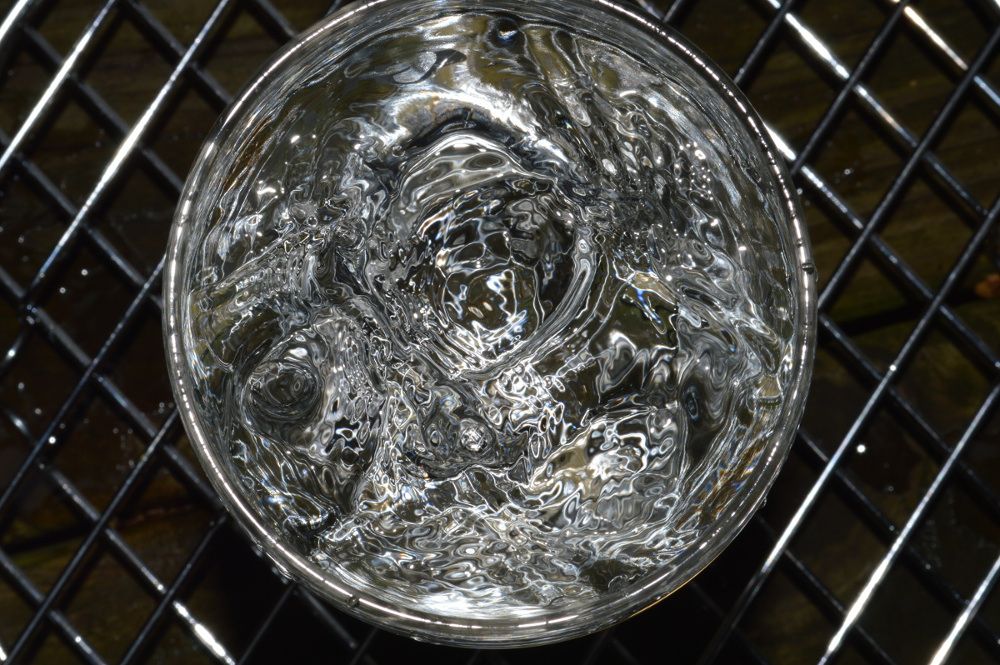
Here's that image, and one of a glass of water on a metal grate rippling from me stomping my foot:
F.U.B.A.R.
Bluelight Crew
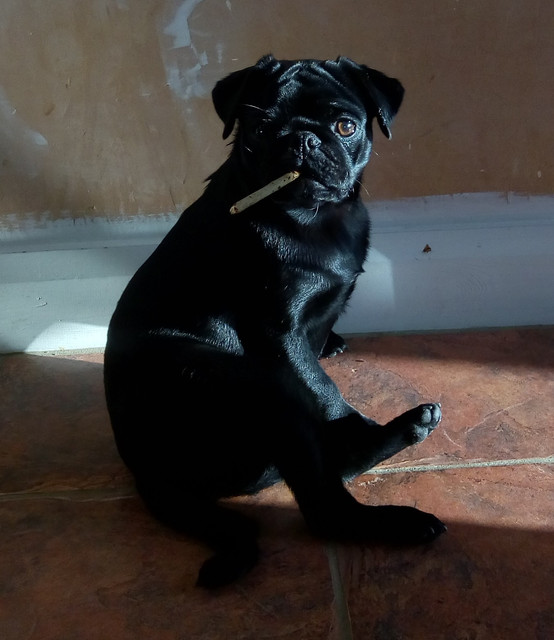
Talk about chiaroscuro...
Took this picture of our pug recently and it's turned out surprisingly well. Although it looks like she's smoking a cigar, she's actually chewing on a twig. The best thing is, it looks to me like a banksy painting...
hydroazuanacaine
bluelighter
- Joined
- May 17, 2007
- Messages
- 8,493
hang it above a poker table.